
Garlic Butter Steak Bites with Crispy Potatoes: 25-Min Dinner
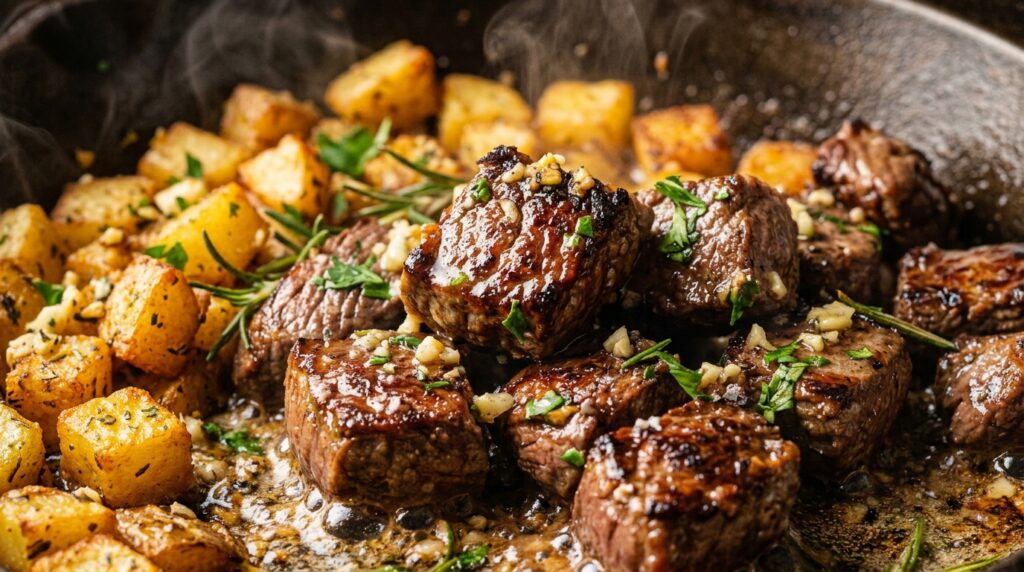
When tender, caramelized cubes of prime sirloin meet golden, crackly Yukon gold potatoes in a sizzling pool of foaming garlic herb butter, pure culinary magic happens in your kitchen in under 25 minutes. This restaurant-quality one-skillet meal delivers all the luxurious richness of an upscale steakhouse dinner without the extravagant price tag, long waiting times, or sink full of dirty pots. Every bite delivers a succulent, mouthwatering contrast between deeply seared beef, velvety garlic pan juices, and melt-in-your-mouth potatoes with delightfully crispy edges. The secret to mastering this show-stopping skillet dinner lies in respecting heat management and ingredient timing. By cooking the potatoes first in a combination of olive oil and butter, you establish a shatteringly crisp exterior while allowing the starchy interior to steam to buttery perfection. Once the potatoes are set aside, the cast-iron skillet reaches scorching steakhouse temperatures, ensuring your bite-sized steak cubes develop a bold, deeply savory mahogany crust in just two minutes per side without overcooking the tender center. Finishing with cold butter, fresh rosemary, thyme, minced garlic, and a splash of rich beef bone broth creates an emulsified pan sauce that glazes every single morsel. Why You’ll Love This Recipe 25-Minute Weeknight Speed: Transforms simple pantry potatoes and premium beef steak into an extraordinary dinner faster than waiting for takeout delivery. Single-Skillet Simplicity: The entire meal comes together in one heavy cast-iron pan, making stovetop cleanup quick and effortless. 100% Halal Wholesome: Made with prime halal beef, pure dairy butter, fresh aromatics, and rich beef bone broth for safe deglazing with absolutely zero alcohol or compromise. Steakhouse Flavor Profile: Foaming garlic herb butter and high-heat caramelization mimic the iconic baste used by top steakhouses worldwide. Key Ingredients & Smart Swaps Fresh, wholesome ingredients arranged on a clean kitchen workstation. Top Sirloin or Ribeye Steak: Choose well-marbled USDA Choice or Prime halal beef. Top sirloin offers lean tenderness and bold beef flavor at a friendly price point, while ribeye or New York strip yields an even richer, melt-in-your-mouth texture. Trim excess surface gristle and cut into uniform 1-inch cubes. Yukon Gold Potatoes: The gold standard for skillet potatoes thanks to their naturally buttery texture and thin skins that do not require peeling. Russets can be substituted if peeled and soaked to remove excess surface starch. Unsalted Butter & Extra Virgin Olive Oil: Olive oil provides a high smoke point that prevents the butter solids from scorching during the initial potato crisping and steak searing, while butter delivers unbeatable richness. Fresh Garlic & Woody Herbs: Freshly minced garlic cloves, fresh rosemary sprigs, and fresh thyme leaves infuse the bubbling butter with irresistible aromatics. Avoid jarred pre-minced garlic, which turns bitter when exposed to high pan heat. Rich Beef Bone Broth: Used to deglaze the skillet pan juices and dissolve the fond without needing cooking wines, resulting in a glossy, deeply savory glaze. Step-by-Step Cooking Walkthrough 1. Prep and Dice: Scrub the Yukon gold potatoes and dice them into uniform 1/2-inch cubes so they cook through quickly and evenly. Cut the trimmed steak into 1-inch bite-sized cubes. Pat the steak thoroughly dry with paper towels to ensure optimal searing rather than steaming. 2. Crisp the Potatoes: Melt 1 tablespoon of butter with 1 tablespoon of olive oil in a 12-inch heavy cast-iron skillet over medium-high heat. Add the diced potatoes in an even layer. Season with 1/2 teaspoon salt and smoked paprika. Let cook undisturbed for 4 to 5 minutes until deep golden brown on the bottom, then stir and cook for an additional 5 minutes until tender and crispy. Transfer potatoes to a warm side plate. Active skillet cooking: tossing seared steak bites and crispy potatoes with foaming garlic herb butter. 3. Sear the Steak Bites: Crank the heat to high. Add the remaining tablespoon of olive oil to the empty skillet. Season the steak cubes with the remaining salt and black pepper, then place them in the smoking skillet in a single spaced layer. Sear undisturbed for 2 minutes until a deep crust develops. Flip and sear for 1 to 2 minutes more. 4. Butter Baste & Deglaze: Turn heat to medium-low. Drop in the remaining 3 tablespoons of butter, minced garlic, chopped rosemary, and thyme. Baste the steak bites with the foaming butter for 60 seconds. Pour in the beef bone broth to lift the caramelized fond from the pan floor. 5. Combine & Garnish: Return the crispy potatoes to the skillet, tossing vigorously for 1 minute to coat every piece in the glossy garlic herb sauce. Remove from the heat immediately to preserve the steak’s juicy tenderness, sprinkle with minced parsley, and serve sizzling hot. 3 Chef Secrets for Perfect Results 1. Dry Your Meat Thoroughly: Moisture is the absolute enemy of a good sear. Always pat your steak cubes with paper towels right before seasoning. If the surface is damp, the meat will steam in its own moisture instead of developing that craveable, caramelized crust. 2. Never Crowd the Skillet: Cook in a large 12-inch cast-iron skillet or work in two batches if needed. When steak bites are packed tightly against each other, the skillet temperature drops rapidly, resulting in chewy gray meat rather than tender browned bites. 3. Add Garlic at Low Heat: Minced garlic contains delicate natural sugars that scorch and turn unpleasantly bitter within seconds at high heat. Always drop the pan temperature to medium-low before adding your garlic and butter basting aromatics. What to Serve With Garlic Butter Steak Bites Plated restaurant-style with warm garlic herb juices, fresh parsley, and artisan sides. Crisp Green Veggies: Roasted asparagus spears, garlic sautéed green beans, or steamed broccolini provide vibrant color and crisp textural balance against the rich meat. Crusty Artisan Bread: Warm sourdough slices or warm garlic ciabatta are essential for mopping up every last drop of flavorful garlic herb pan butter. Refreshing Beverages: Pair with chilled sparkling water infused with fresh lemon and lime wedges, or a rich non-alcoholic pomegranate spritzer. Storage, Freezing & Reheating Instructions Refrigeration: Store
One-Skillet Beef and Broccoli Ramen Stir Fry
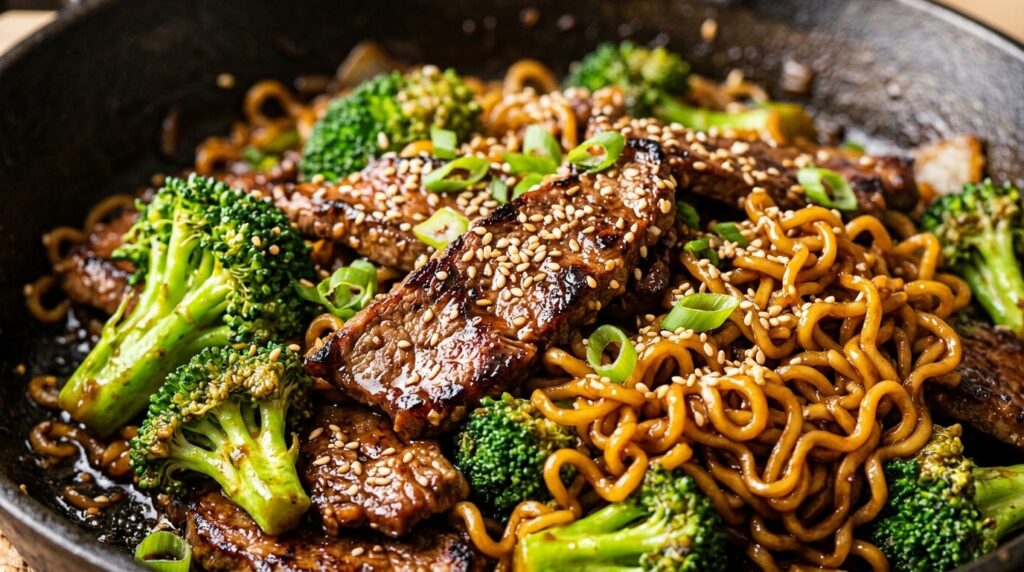
The irresistible sizzle of paper-thin flank steak searing in a smoking cast-iron skillet, mingling with sweet caramelized broccoli florets and glossy, curly ramen noodles, brings authentic takeout excitement straight into your home in twenty minutes flat. Coated in a rich, velvety garlic-ginger soy glaze and topped with toasted sesame seeds and fresh scallions, this one-skillet beef and broccoli ramen stir fry delivers unbeatable weeknight flavor with minimal cleanup. Transforming humble instant ramen noodles into a gourmet culinary masterpiece is all about smart technique. By discarding the high-sodium preservative flavor packet and boiling the wavy noodles for only two minutes, they retain an elastic, chewy “al dente” bite. When tossed into a hot pan with a homemade reduction of rich beef bone broth, low-sodium tamari, sweet honey, and aromatic toasted sesame oil, every single curve of the ramen absorbs intense savory complexity without getting mushy. Why You’ll Love This Recipe 20-Minute Weeknight Magic: Faster than restaurant delivery, moving seamlessly from cutting board to dining table in just twenty minutes. One Skillet Simplicity: Cooking the beef, broccoli, and saucy noodles in a single skillet keeps kitchen sink cleanup completely effortless. High-Protein & Nutrient-Packed: Packed with 32 grams of lean halal beef protein and crisp, antioxidant-loaded broccoli florets. 100% Halal Wholesome: Made with pure natural ingredients—halal flank steak, dark beef bone broth, garlic, ginger, and sesame (zero pork, zero alcohol/mirin/cooking wine). Key Ingredients & Smart Swaps Halal beef flank steak, fresh broccoli florets, wavy ramen noodle blocks, garlic, ginger, and sesame oil. Halal Flank Steak: The best cut for high-heat stir frying. Slicing against the grain ensures tender, melt-in-your-mouth bites. Swap: Lean ground beef, sirloin, or sliced chicken breast work wonderfully! Fresh Broccoli Florets: Chopped into small bite-sized clusters so they steam and cook quickly while maintaining a bright, crisp crunch. Ramen Noodle Cakes: Inexpensive instant ramen packages (any brand) work perfectly—just discard the powder packet. Swap: Fresh udon noodles or rice noodles make great alternatives. Savory Garlic-Ginger Glaze: A wholesome blend of dark beef bone broth, low-sodium soy sauce, raw honey, toasted sesame oil, minced garlic, and freshly grated ginger. Toasted Sesame Oil & Seeds: Imparts a deeply fragrant, nutty toasted aroma that ties the entire stir fry together. Fresh Scallions: Sliced thinly, separating the white parts for cooking and the green ribbons for a fresh crisp garnish. Step-by-Step Cooking Walkthrough 1. Under-Cook the Ramen: Drop dry ramen noodle cakes into boiling water for exactly 2 minutes until loosened but still chewy. Drain, rinse with cool water, and toss with a drop of sesame oil to prevent sticking. 2. Whisk the Glaze: In a measuring cup, whisk beef bone broth, soy sauce, honey, rice vinegar, sesame oil, garlic, ginger, and cornstarch until smoothly incorporated. Vigorously tossing seared flank steak, tender-crisp broccoli, and ramen noodles in sizzling garlic soy glaze. 3. Flash-Sear the Beef: Heat 1 tablespoon of oil in a large skillet or wok over high heat. Sear the beef slices for 90 seconds without disturbing until caramelized edges develop. Flip, cook for 60 seconds, and transfer to a side plate. 4. Steam the Broccoli: Add remaining oil to the pan with broccoli florets. Add 2 tablespoons of water and cover for 2 minutes to flash-steam into vibrant emerald green tenderness. 5. Glaze & Toss: Pour in the sauce and let it simmer for 60 seconds until glossy and thick. Toss in the cooked ramen and seared beef with tongs until thoroughly drenched in sizzling sauce. 3 Chef Secrets for Perfect Results 1. Slice Beef Paper-Thin Across the Grain: For the most tender stir-fry steak, pop your flank steak in the freezer for 15 minutes before slicing. Chilling firms the beef, allowing you to slice paper-thin ribbons across the grain with ease. 2. Never Over-Boil the Noodles: Instant ramen turns soggy rapidly if boiled fully in water. Cooking them for only 2 minutes leaves them slightly under-done, allowing them to drink in the savory garlic soy sauce directly in the skillet without losing their chew. 3. Flash-Steam with a Pan Lid: Broccoli stems can be tough if merely stir-fried. Adding two tablespoons of water and trapping the steam under a tight lid cooks the florets to tender-crisp perfection in under 120 seconds. What to Serve With Beef and Broccoli Ramen Served Asian bistro-style with crispy chili oil, toasted sesame seeds, and chilled jasmine iced tea. Crispy Chili Crunch / Sriracha: Drizzle artisanal chili oil or sriracha over the noodles for an extra layer of spicy excitement. Crispy Garlic Edamame: Steamed edamame pods tossed in sea salt, toasted sesame oil, and crispy fried garlic chips. Chilled Cucumber Salad: Sliced cucumbers tossed in rice vinegar, sesame seeds, and sea salt to provide a cool, crunchy contrast. Iced Jasmine Green Tea: Fragrant, unsweetened chilled jasmine tea with a lemon wedge to cleanse the palate. Storage, Freezing & Reheating Instructions Refrigeration: Store leftover beef and broccoli ramen in an airtight glass container in the refrigerator for up to 3 days. Quick Skillet Reheating: Reheat in a skillet or wok over medium heat with 1 to 2 tablespoons of water or beef broth for 3 minutes, tossing with tongs until heated through and saucy again. Freezer Tip: Stir-fried ramen noodles are best enjoyed freshly prepared, as cooked ramen can lose its firm elastic texture when frozen. Frequently Asked Questions Can I use ground beef instead of flank steak?Yes! Brown 1 lb of lean ground beef in the skillet, draining any excess fat, before tossing with the broccoli, ramen noodles, and sauce. It’s an ultra-budget-friendly family variation! Can I add other vegetables like bell peppers or snap peas?Absolutely. Sugar snap peas, sliced red bell peppers, baby corn, or shredded carrots can all be tossed in with the broccoli for extra crunch and color. Is this recipe gluten-free adaptable?Yes, simply substitute gluten-free brown rice ramen noodles and use certified gluten-free tamari or coconut aminos in place of regular soy sauce. Pin This Recipe for Later Need a quick 20-minute dinner tonight? Save this pin to your Quick Dinners
Slow Cooker Melt-in-Your-Mouth Beef Pot Roast
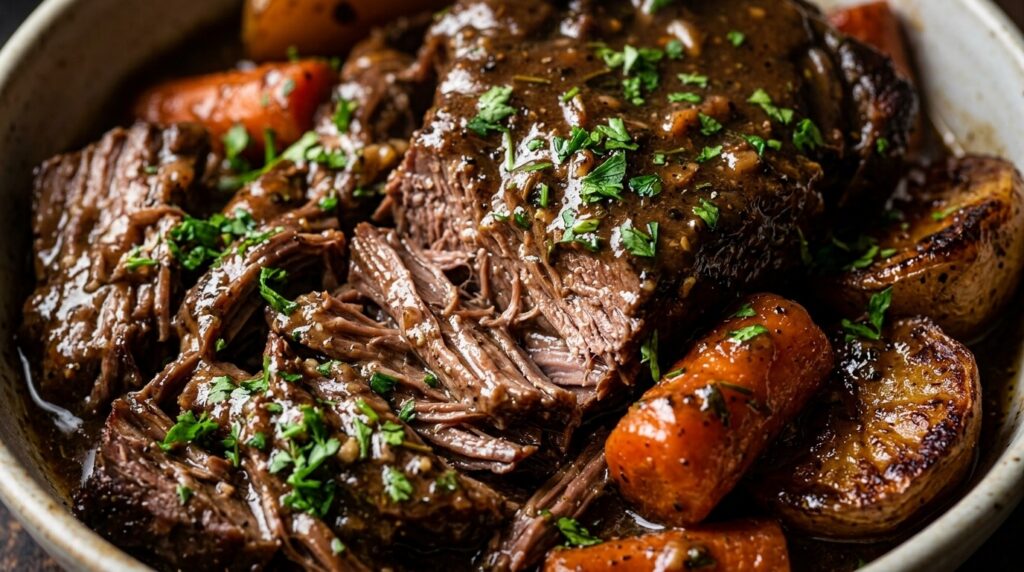
There is nothing quite as comforting on a brisk autumn evening as returning home to the rich, savory aroma of beef chuck roast slow-braised to fork-tender perfection in an herb-infused bone broth gravy. Surrounded by tender baby potatoes and caramelized carrot chunks, this slow cooker melt-in-your-mouth beef pot roast transforms an economical cut of halal beef into an opulent, restaurant-caliber feast that falls apart with the gentlest press of a fork. While standard pot roast recipes often yield tough meat or watery, bland broth, the secret to true culinary luxury lies in two pivotal steps: achieving an aggressive, caramelized sear on a smoking-hot skillet before the roast touches the slow cooker, and deglazing those savory browned fond bits with rich beef bone broth. As the beef simmers low and slow over eight gentle hours, its dense collagen fibers slowly melt into gelatin, infusing the surrounding vegetables and pan juices with incomparable richness. Why You’ll Love This Recipe True Hands-Off Comfort: Spend 20 minutes searing in the morning, and let your slow cooker handle the rest while you work or relax. Complete One-Pot Meal: Succulent protein, buttery baby potatoes, and sweet caramelized carrots simmer together in one vessel. Velvety Restaurant Gravy: Cooking with rich bone broth and finishing with a quick cornstarch reduction delivers thick, spoon-coating luxury without watery runniness. 100% Halal Wholesome: Pure halal-certified beef, fresh autumn root vegetables, aromatic herbs, and zero alcohol deglazing. Key Ingredients & Smart Swaps Marbled halal beef chuck roast, sweet carrots, baby potatoes, onions, and fresh garden herbs. Halal Beef Chuck Roast: The gold standard cut for pot roast. Look for a roast with abundant white intramuscular marbling that will melt into juicy tenderness. Swap: Beef brisket or boneless beef short ribs work wonderfully. Hearty Carrots: Cut whole peeled carrots into thick 2-inch chunks rather than baby carrots. Thick chunks retain pleasant bite and will not turn to mush over eight hours. Baby Red or Yukon Gold Potatoes: Their waxy, dense skins hold their structure intact throughout the long braising process without disintegrating. Rich Beef Bone Broth: Rich low-sodium beef broth forms the savory braising backbone. Pro-Tip: A tablespoon of tomato paste and a splash of Worcestershire sauce adds deep roasted complexity without needing red wine! Fresh Rosemary & Thyme: Fresh whole sprigs tied with kitchen twine release fragrant essential oils that perfume the rich gravy. Yellow Onions & Smashed Garlic: Forms the aromatic foundation at the base of the crock pot, caramelizing under the weight of the seared beef. Step-by-Step Cooking Walkthrough 1. Aggressive High-Heat Sear: Season your dry chuck roast heavily with kosher salt and cracked black pepper. Sear in a smoking cast-iron skillet for 4 to 5 minutes per side until a dark mahogany crust forms. Never skip this step—color equals deep savory flavor! 2. Caramelize Aromatics: Sauté thick onion wedges and smashed garlic in the skillet drippings, stir in tomato paste, and deglaze the pan with 1/2 cup of beef bone broth, scraping up all caramelized bits. Gently pulling the succulent beef chuck roast into juicy shreds directly in the slow cooker juices. 3. Slow Cooker Layering: Place the seared roast in the slow cooker insert, top with onions, surround with chunky carrots and potatoes, and nestle fresh rosemary, thyme, and bay leaves around the meat. Pour in the remaining broth and Worcestershire sauce. 4. Low and Slow Braise: Secure the lid and cook on LOW for 8 to 9 hours. Low heat allows the tough connective tissues to gently break down without seizing the beef fibers. 5. Shred & Gravy Glaze: Transfer beef and vegetables to a warm platter. Shred meat into generous chunks. Whisk a simple cornstarch slurry into the braising liquid on HIGH for 10 minutes to create an unctuous, velvety gravy to spoon over the roast. 3 Chef Secrets for Perfect Results 1. Low Heat Trumps High Heat Every Time: While you can cook pot roast on HIGH for 5 hours, cooking on LOW for 8 to 9 hours produces substantially more tender, succulent meat fibers that melt in your mouth rather than chew like stew meat. 2. Pat the Meat Bone-Dry Before Searing: Moisture is the enemy of browning. Moisture trapped on the meat surface creates steam, which boils the exterior rather than crisping it. Thoroughly blot the roast with paper towels before hitting the hot skillet. 3. Cut Root Vegetables into Large Chunks: Dainty carrot slices and quartered russets will disintegrate into baby food over eight hours. Keep carrots at 2 inches and use small, whole or halved waxy potatoes to maintain distinct textural contrast. What to Serve With Beef Pot Roast Served rustic-style with warm buttered dinner rolls, glazed carrots, and velvety dark herb gravy. Warm Buttered Dinner Rolls: Soft, pillowy rolls are essential for sopping up every single drop of savory herb beef gravy. Creamy Horseradish Sauce: Prepared horseradish folded into sour cream with a squeeze of lemon and chives provides a sharp, zesty counterpoint. Crisp Garden Salad: Bitter greens like arugula and radicchio tossed in a sharp mustard-shallot vinaigrette to cleanse the palate. Warm Spiced Apple Cider: Hot simmered apple cider with cinnamon sticks and orange slices for cozy autumn warmth. Storage, Freezing & Reheating Instructions Refrigeration: Pot roast is famous for tasting even better on day two! Store cooled beef, vegetables, and gravy in an airtight container for up to 4 days. The gravy will form a solid gelatin cap in the fridge that melts back into liquid silk upon warming. Gentle Stove Reheating: Warm in a Dutch oven or covered skillet over medium-low heat with a splash of beef broth for 10 minutes until hot and bubbly. Avoid the microwave, which can toughen the shredded beef fibers. Freezer Storage: Shredded beef pot roast with its gravy freezes exceptionally well for up to 3 months. (Note: cooked potatoes may become slightly grainy upon thawing, so consider freezing beef and gravy separately). Frequently Asked Questions Can I make this pot roast without searing it first?Technically yes, but searing creates the
20-Minute Creamy Garlic Parmesan Tortellini

Few weeknight comfort meals rival the pure culinary satisfaction of tender, ricotta-stuffed tortellini swimming in a velvety, golden garlic parmesan cream sauce. Studded with sweet pops of tender baby peas and ribbons of vibrant wilted spinach, this 20-minute creamy garlic parmesan tortellini delivers high-end Italian trattoria decadence straight to your dinner table in less time than it takes to order takeout. The magic behind this lightning-fast skillet recipe is its reliance on refrigerated fresh pasta, which cooks in a mere three minutes while your skillet cream sauce gently simmers. By blooming freshly minced garlic in sweet butter and gradually melting authentic Parmigiano-Reggiano into heavy cream, you create an emulsion so silky and clingy that every ridge and crevice of the tortellini holds maximum savory flavor without separating or turning greasy. Why You’ll Love This Recipe Ready in Just 20 Minutes: A true lightning-fast weeknight hero made with pantry and fridge staples that saves busy evenings. One-Skillet Simmer: The luscious sauce, sweet peas, and fresh spinach come together in a single pan for effortless weeknight cleanup. Pure Italian Indulgence: Rich heavy cream and genuine aged Parmigiano-Reggiano create an authentic, velvety cream emulsion. 100% Halal Wholesome: Made with wholesome dairy cheeses, fresh aromatic garlic, and wholesome vegetables (zero pork bacon/prosciutto, zero alcohol deglazing). Key Ingredients & Smart Swaps Fresh three-cheese tortellini, Parmigiano-Reggiano, heavy cream, sweet peas, and tender spinach. Refrigerated Three-Cheese Tortellini: Look for fresh refrigerated tortellini stuffed with creamy ricotta, mozzarella, and parmesan. Swap: Frozen tortellini works equally well—just add 2 minutes to the boiling time. Fresh Garlic: Four plump cloves minced finely or grated directly into the pan ensure deep aromatic warmth without overpowering bitterness. Heavy Whipping Cream & Broth: Rich heavy cream provides velvety body, while a splash of vegetable or chicken bone broth prevents the sauce from becoming too heavy. Freshly Grated Parmigiano-Reggiano: Always grate your parmesan fresh from the block. Pre-grated container cheeses contain anti-caking starches that cause sauce graininess. Sweet Baby Green Peas: Adds natural sweetness and vibrant color. Frozen peas can be added straight to the sauce without pre-thawing! Fresh Baby Spinach: Delicate baby spinach wilts within seconds in the warm sauce, adding essential vitamins and earthy freshness. Pinch of Ground Nutmeg: The classic French and Italian white sauce secret that enhances dairy richness without tasting sweet. Step-by-Step Cooking Walkthrough 1. Quick Boil Tortellini: Drop fresh cheese tortellini into well-salted boiling water. Cook for only 2 to 3 minutes until they bob to the surface. Drain promptly so they remain pleasantly al dente. 2. Gentle Garlic Bloom: Melt unsalted sweet butter in a large deep skillet over medium heat. Sauté the minced garlic for 60 seconds until fragrant and aromatic, keeping the heat controlled so the garlic remains golden and sweet. Gently stirring fresh tortellini, sweet peas, and baby spinach into bubbling garlic cream sauce. 3. Simmer & Emulsify: Pour in the heavy cream and broth, bringing the mixture to a gentle simmer for 3 minutes. Turn heat to low and gradually stir in freshly grated parmesan until completely melted into a glossy ribbon. 4. Wilt Greens & Coat: Toss in the sweet peas and baby spinach, stirring for 60 seconds until spinach softens. Gently fold the warm tortellini into the sauce until thoroughly coated in garlic parmesan cream. 5. Garnish & Plate: Spoon into warm pasta bowls and finish with shaved parmesan curls, fresh basil, and cracked black pepper. 3 Chef Secrets for Perfect Results 1. Never Boil Tortellini All the Way: Pull the tortellini from the boiling water about 60 seconds before full tenderness. The pasta will finish cooking directly in the hot skillet cream sauce, absorbing flavorful garlic cream into its pasta dough. 2. Kill the Heat Before Adding Cheese: Excessive heat breaks emulsion and curdles cheese fat. Always drop the burner to LOW or remove the pan from heat entirely before whisking in your Parmigiano-Reggiano. 3. Save a Splash of Starchy Water: Before draining your tortellini, ladle out 1/4 cup of the starchy pasta cooking water. If your cream sauce thickens too quickly upon cooling, a tablespoon of pasta water instantly restores a silky restaurant glaze. What to Serve With Creamy Garlic Tortellini Served trattoria-style with toasted garlic sourdough, shaved parmesan, and fresh sweet basil. Toasted Garlic Sourdough: Thick, crusty slices of sourdough brushed with garlic butter and toasted until golden for dipping into extra cream sauce. Crisp Italian Chopped Salad: Romaine lettuce, shaved fennel, cherry tomatoes, and cucumber tossed in a bright lemon-oregano vinaigrette to cut through the richness. Grilled Lemon Herb Chicken Cutlets: Add pan-seared chicken strips on top for an effortless 40g+ protein weeknight dinner. Refreshing Citrus Spritzer: Chilled sparkling mineral water with a squeeze of fresh lemon and a sprig of fresh rosemary. Storage, Freezing & Reheating Instructions Refrigeration: Transfer cooled tortellini to an airtight glass container and store in the refrigerator for up to 3 days. Gentle Skillet Reheating: Cream sauces absorb into pasta as they sit. Reheat leftovers in a skillet over low heat with 2 tablespoons of milk or broth, stirring gently until warm and creamy again. Avoid high microwave heat to prevent cheese separation. Freezer Tip: Fresh cooked tortellini in heavy cream sauce does not freeze well due to dairy separation; this dish is best enjoyed fresh or within 3 days. Frequently Asked Questions Can I use spinach tortellini or meat tortellini?Yes! Spinach and ricotta tortellini adds great color, while halal beef or chicken tortellini provides delicious savory heartiness that pairs wonderfully with the garlic parmesan cream. Can I make this lighter with half-and-half?You can substitute half-and-half for heavy cream, but simmer it gently and whisk in 1 teaspoon of cornstarch slurried with broth to maintain a thick, clingy consistency. Can I add other vegetables like mushrooms or sun-dried tomatoes?Absolutely! Sliced cremini mushrooms sautéed with the garlic or chopped oil-packed sun-dried tomatoes add marvelous depth and Tuscan flair to this versatile skillet. Pin This Recipe for Later Need a fast, crowd-pleasing dinner tonight? Save this pin to your Quick Dinners or Pasta
Ultra Creamy Roasted Garlic Mashed Potatoes
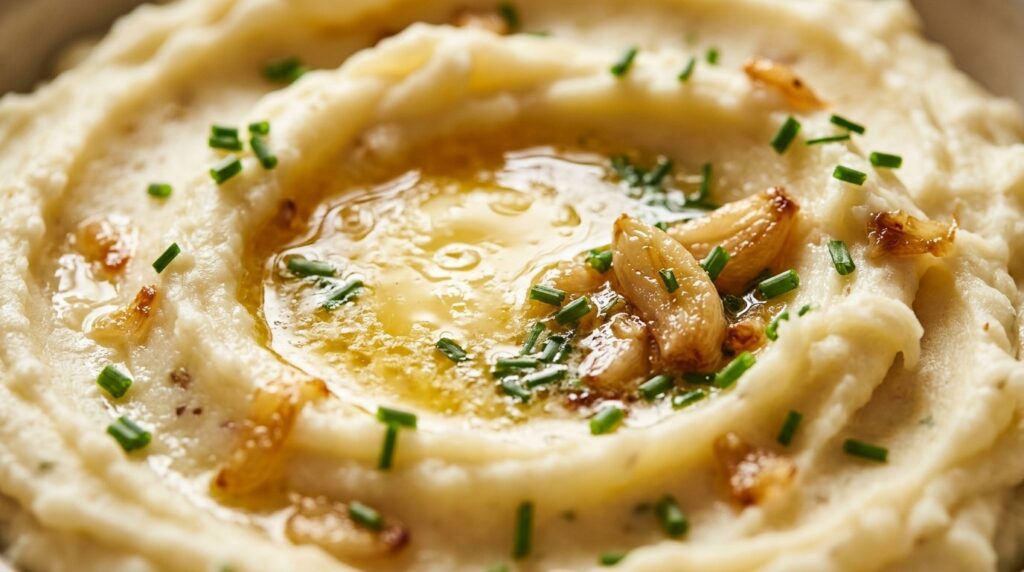
A generous swirl of velvety, cloud-like potatoes crowned with a glistening pool of sweet golden butter and infused with the mellow, caramelized warmth of whole roasted garlic heads is the hallmark of an unforgettable holiday feast. These ultra creamy roasted garlic mashed potatoes transform humble Yukon Golds into an opulent, restaurant-worthy side dish that commands center stage on your Thanksgiving, Christmas, or Sunday dinner table. While standard mashed potatoes can often turn out heavy, bland, or disappointingly gummy, the secret to true culinary luxury lies in two chef techniques: oven-roasting garlic to mellow its sharp pungency into sweet buttery sweetness, and passing hot potatoes through a ricer to achieve unmatched fluffiness. Combined with gentle folds of warmed heavy cream and rich European-style butter, every spoonful melts effortlessly across the palate without an ounce of heaviness. Why You’ll Love This Recipe Mellow Caramelized Garlic Flavor: Roasting two entire heads of garlic turns the pungent cloves into soft, sweet spreadable gold with zero harsh bite. Flawlessly Smooth Texture: The steam-drying and ricing method guarantees a restaurant-caliber silky texture without lumps or gluey gumminess. Holiday Make-Ahead Friendly: Keeps beautifully warm in a slow cooker on LOW for up to 3 hours without drying out or separating. 100% Halal Wholesome: Made with pure natural ingredients—golden Yukon potatoes, rich dairy butter, fresh cream, and fragrant herbs. Key Ingredients & Smart Swaps Yukon Gold potatoes, whole roasted garlic heads, sweet butter, heavy cream, and fresh herbs. Yukon Gold Potatoes: The undisputed champion for mashing. Their naturally buttery flavor and medium starch content create a luxurious texture without absorbing excess water. Swap: Russet potatoes produce an ultra-fluffy mash, but require extra butter for richness. Two Whole Garlic Heads: Roasting caramelizes the natural sugars inside the cloves, yielding an earthy, sweet richness that infuses the entire mash. Unsalted High-Fat Butter: Sweet cream butter adds pure decadence. Using unsalted lets you precisely dial in the salt balance. Warm Heavy Cream & Whole Milk: Warming the dairy before incorporating prevents shocking the potato starches, keeping the texture velvety. Swap: Half-and-half works well for a slightly lighter weeknight version. Fresh Chives & Garden Thyme: Provides a sharp, vibrant onion-like crunch and herbaceous aroma that balances the rich dairy. Sea Salt & White Pepper: White pepper seasons the mash thoroughly while preserving the pristine ivory-gold appearance. Step-by-Step Cooking Walkthrough 1. Caramelize the Garlic: Slice the top off two garlic heads, drizzle with olive oil, wrap in foil, and roast at 400°F (200°C) for 40 to 45 minutes until deep golden and spoon-soft. 2. Cold Water Start: Place peeled, evenly chunked Yukon Gold potatoes into a large pot and cover with cold water. Starting in cold water ensures the potato cubes cook at the same rate from core to surface. Passing steaming Yukon potatoes through a stainless steel ricer directly over butter cubes. 3. Steam-Dry the Potatoes: Once fork-tender, drain thoroughly. Return the hot potatoes to the warm empty pot over low heat for 90 seconds. Gently shake to allow trapped steam to escape—dry potatoes absorb cream and butter far better! 4. Rice into Perfection: Pass the steaming potatoes through a ricer or food mill directly into the pot. Squeeze out the roasted garlic cloves, mash into a silky paste, and fold in with the softened butter cubes. 5. Fold in Warm Cream: Slowly stream in the warm heavy cream and milk mixture, folding gently with a spatula until smooth, glossy, and cloud-like. Finish with salt and pepper to taste. 3 Chef Secrets for Perfect Results 1. Always Use a Potato Ricer: Food processors shear potato starch cells and release amylose, creating an unappetizing gluey paste. A potato ricer gently extrudes the potatoes, ensuring a velvet-smooth mash every single time. 2. Never Add Cold Dairy: Pouring cold milk or cream straight from the fridge immediately drops the temperature of the potatoes, causing the butter to solidify and resulting in a greasy mouthfeel. Always warm your cream and milk gently before blending. 3. Don’t Skip Steam-Drying: Water is the mortal enemy of rich mashed potatoes. Taking 90 seconds to cook off surface moisture in the warm pot ensures every microscopic starch pocket is thirsty to soak up pure butter and rich garlic cream. What to Serve With Roasted Garlic Mashed Potatoes Served family-style on a festive holiday table with roasted garlic cloves, melting butter, and gravy. Holiday Roast Turkey & Gravy: The classic Thanksgiving pairing—spoon rich homemade herb turkey gravy right into the buttery mashed potato crater. Garlic Herb Beef Roast: Tender slow-roasted halal beef pot roast or prime rib with savory pan drippings. Crispy Green Beans or Brussels Sprouts: Roasted with shallots and toasted almonds for a bright, crunchy contrast to the velvety mash. Warm Artisan Dinner Rolls: Fluffy cloverleaf dinner rolls to mop up every last drop of garlic butter cream. Storage, Freezing & Reheating Instructions Refrigeration: Allow mashed potatoes to cool completely, then transfer to an airtight glass container. Store in the refrigerator for up to 4 days. Gentle Stove Reheating: Warm in a heavy saucepan over low heat, splashing in 2 to 3 tablespoons of warm milk or heavy cream while stirring gently with a wooden spoon until hot and velvety. Oven or Slow Cooker Method: Transfer to a buttered baking dish, cover with foil, and bake at 350°F (175°C) for 25 minutes. Alternatively, keep warm on the LOW setting of a slow cooker for up to 3 hours with a splash of cream. Frequently Asked Questions Can I roast the garlic ahead of time?Yes! You can roast the heads of garlic up to 4 days in advance. Squeeze the caramelized cloves into a small glass jar, submerge with a thin layer of olive oil, and keep sealed in the refrigerator until ready to mash. Why are my mashed potatoes sometimes gummy?Gumminess occurs when potatoes are over-worked or processed with an immersion blender or food processor, which tears open starch cells and creates glue. Use a potato ricer or hand masher for perfect fluffiness. Can I freeze roasted garlic
Easy Sheet Pan Chicken Fajitas with Lime Crema
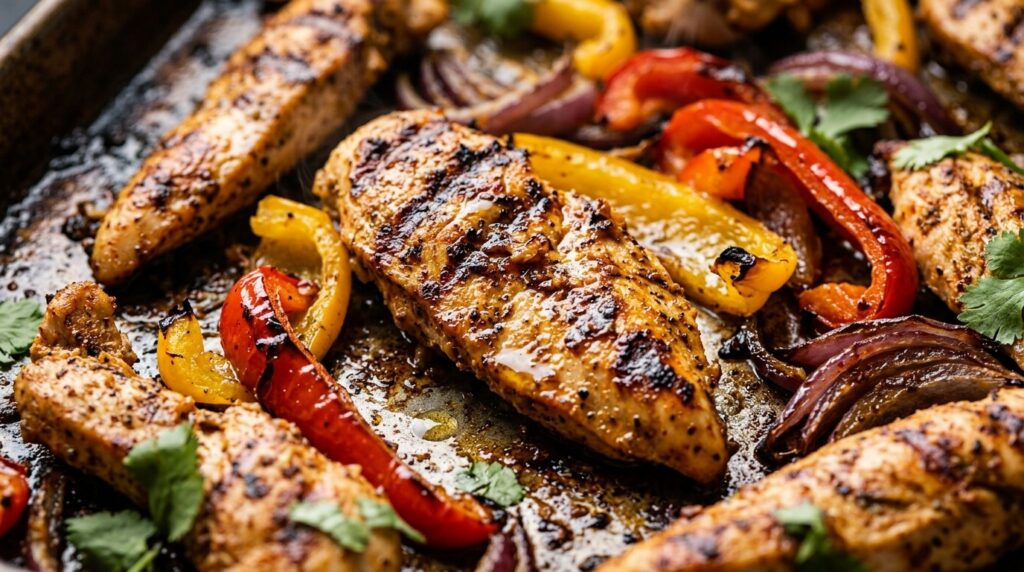
The irresistible sizzle of tender, spiced chicken breast strips caramelizing alongside sweet bell peppers and red onions fills your kitchen with vibrant Mexican cantina aromas in just thirty minutes. Roasted entirely on a single sheet pan at high heat, these sheet pan chicken fajitas deliver juicy, flavorful bites with blistered charred edges—elevated to restaurant status with a velvety drizzle of fresh cilantro-lime crema. Weeknight cooking often forces a frustrating choice between vibrant, bold flavor and time-consuming sink cleanup. This easy sheet pan method eliminates the compromise entirely by relying on high-temperature dry heat roasting to mimic the intense sear of a cast-iron skillet without oil splatter. When coated in a fragrant blend of smoky cumin, sweet paprika, and zesty chili powder, the chicken remains exceptionally tender while the peppers soften into sweet, smoky ribbons of pure flavor. Why You’ll Love This Recipe Effortless 30-Minute Routine: Just 10 minutes of slicing and 20 minutes in the oven transforms raw ingredients into a vibrant family feast. Single-Pan Cleanup: One parchment-lined baking sheet means you can enjoy dinner without facing a mountain of greasy pots and pans. Wholesome & High-Protein: Loaded with lean chicken breast, vibrant antioxidant-rich bell peppers, and clean Mexican spices (100% Halal wholesome). Bright Lime Crema Finish: The zesty, cooling sauce cuts right through the smoky spices for the ultimate crave-worthy restaurant bite. Key Ingredients & Smart Swaps Fresh chicken breast, colorful rainbow bell peppers, spices, and lime crema ingredients. Boneless Skinless Chicken Breasts: Sliced across the muscle grain into 1/2-inch strips to lock in moisture and remain fork-tender. Swap: Boneless chicken thighs work wonderfully for extra richness. Rainbow Bell Peppers: A combination of red, yellow, and green bell peppers delivers the ideal balance of natural sweetness and mild crispness. Red Onion: Sliced into thick wedges so they soften and caramelize around the edges without burning into the pan. Signature Fajita Spice Blend: Pure ground cumin, mild chili powder, garlic powder, smoked paprika, sea salt, and Mexican oregano. Avoid pre-packaged packets high in sodium and starch fillers. Cooling Cilantro-Lime Crema: Real sour cream whisked with fresh lime zest, fresh lime juice, and chopped cilantro. Swap: Use 2% or 5% plain Greek yogurt for an even higher protein boost! Warm Tortillas: Small street-taco-sized white corn or soft flour tortillas. Step-by-Step Cooking Walkthrough 1. Prep & Oven Setup: Crank your oven to 425°F (220°C). High heat is mandatory to achieve that signature blistered sear without overcooking the lean chicken breast. Line an 18×13-inch rimmed baking sheet with unbleached parchment paper. 2. Uniform Slicing: Slice your chicken breasts into uniform 1/2-inch strips. Slice the bell peppers and onions into matching 1/3-inch ribbons. Consistent thickness ensures every piece roasts at the exact same pace. Tossing chicken, sweet peppers, and Mexican spices directly on the baking sheet for even coating. 3. Season Directly on the Pan: Place your chicken and vegetables onto the sheet pan, drizzle with extra virgin olive oil, and shower with your spice mixture. Use tongs to toss everything until thoroughly coated in spiced oil, then spread out into a single, uncrowded layer. 4. High-Heat Roast: Roast at 425°F for 20 to 22 minutes, flipping once at the 12-minute mark. You are looking for chicken that reads 165°F (74°C) with slightly blistered pepper tips. 5. Whisk Crema & Finish: While the pan roasts, whisk your sour cream, lime zest, lime juice, and chopped cilantro together. Warm your tortillas on a dry skillet, assemble generously, and finish with a cold drizzle of lime crema. 3 Chef Secrets for Perfect Results 1. Never Overcrowd the Sheet Pan: If your ingredients are piled high on top of one another, moisture will become trapped and steam your meat rather than sear it. Spread everything in a clean single layer; use two sheet pans if doubling the recipe. 2. Don’t Skip the Lime Zest: The aromatic essential oils live in the lime skin, not just the juice. Whisking fresh finely grated lime zest into the crema infuses an intense citrus punch that brightens the rich savory spices. 3. Slice Chicken Across the Grain: Look closely at your chicken breast before cutting to identify the direction of the muscle fibers. Slicing perpendicularly across the grain shortens the meat fibers, ensuring your fajita strips are tender and never chewy. What to Serve With Sheet Pan Chicken Fajitas Served cantina-style in warm tortillas with creamy lime drizzle, avocado slices, and lime wedges. Fluffy Mexican Rice: Long-grain white rice toasted in olive oil and simmered in seasoned tomato-garlic broth. Simmered Black Beans: Warm black beans seasoned with cumin, garlic, and fresh lime juice topped with crumbled queso fresco. Fresh Guacamole & Pico de Gallo: Chunky avocado mashed with sea salt, lime juice, diced jalapeño, and vine-ripened tomatoes. Refreshing Beverage: Crisp sparkling water infused with fresh mint and lime slices, or an iced agua de Jamaica. Storage, Freezing & Reheating Instructions Refrigeration: Transfer cooled fajita meat and roasted vegetables into an airtight glass container. Store in the refrigerator for up to 4 days. Store the lime crema separately in a small sealed jar for up to 5 days. Gentle Reheating: Reheat in a preheated skillet over medium heat for 3 to 4 minutes with a splash of water or chicken broth to refresh the juices, or warm on a baking sheet at 350°F (175°C) for 6 to 8 minutes. Freezer Prep: You can freeze the seasoned raw chicken and sliced peppers in a zip-top freezer bag with olive oil and spices for up to 3 months. Thaw in the fridge overnight and spread onto your sheet pan to bake as directed! Frequently Asked Questions Can I make sheet pan fajitas with chicken thighs instead of breasts?Yes, boneless skinless chicken thighs work brilliantly! Thighs have slightly higher fat content, making them exceptionally forgiving against overcooking while delivering rich, juicy flavor. How do I keep sheet pan fajitas from getting watery?Excess moisture comes from overcrowding the pan or roasting at too low a temperature. Roast at 425°F on a large half-sheet pan so
Delicious Vegan Spinach Artichoke Cups Ready in 30 Minutes
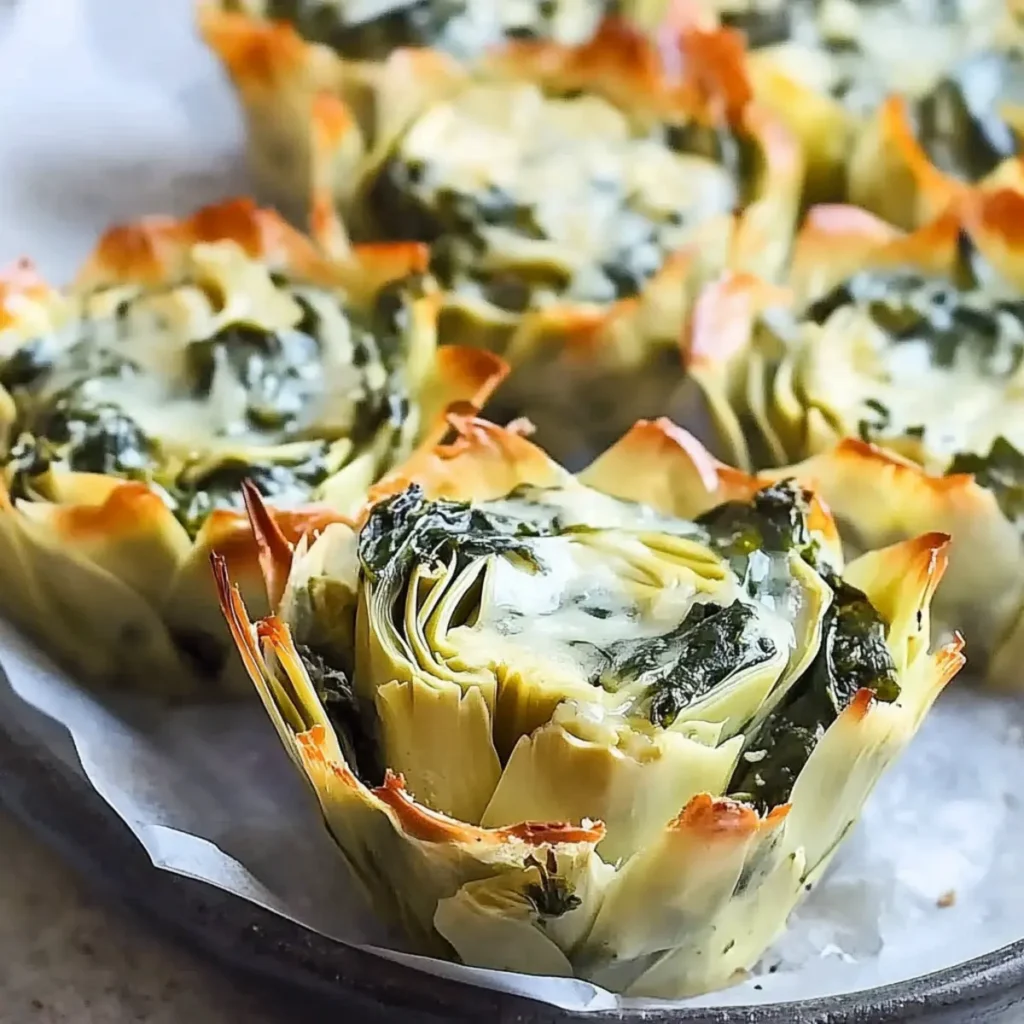
Vegan Spinach Artichoke Cups are the kind of appetizer that makes you feel like you
Delicious Jalape

Imagine biting into a warm, golden-brown jalape
Deliciously Crispy Mini Cheese Quesadillas in Just 20 Minutes

When life gets hectic, there’s nothing quite like a quick and cheesy indulgence to bring a smile to your face. Imagine sinking your teeth into a crispy mini cheese quesadilla, the gooey cheese stretching out and dancing with your taste buds, making every bite a journey of joy. This delightful treat is not just another snack; it
Easy Parmesan Broccoli Recipe for a Delicious Side Dish
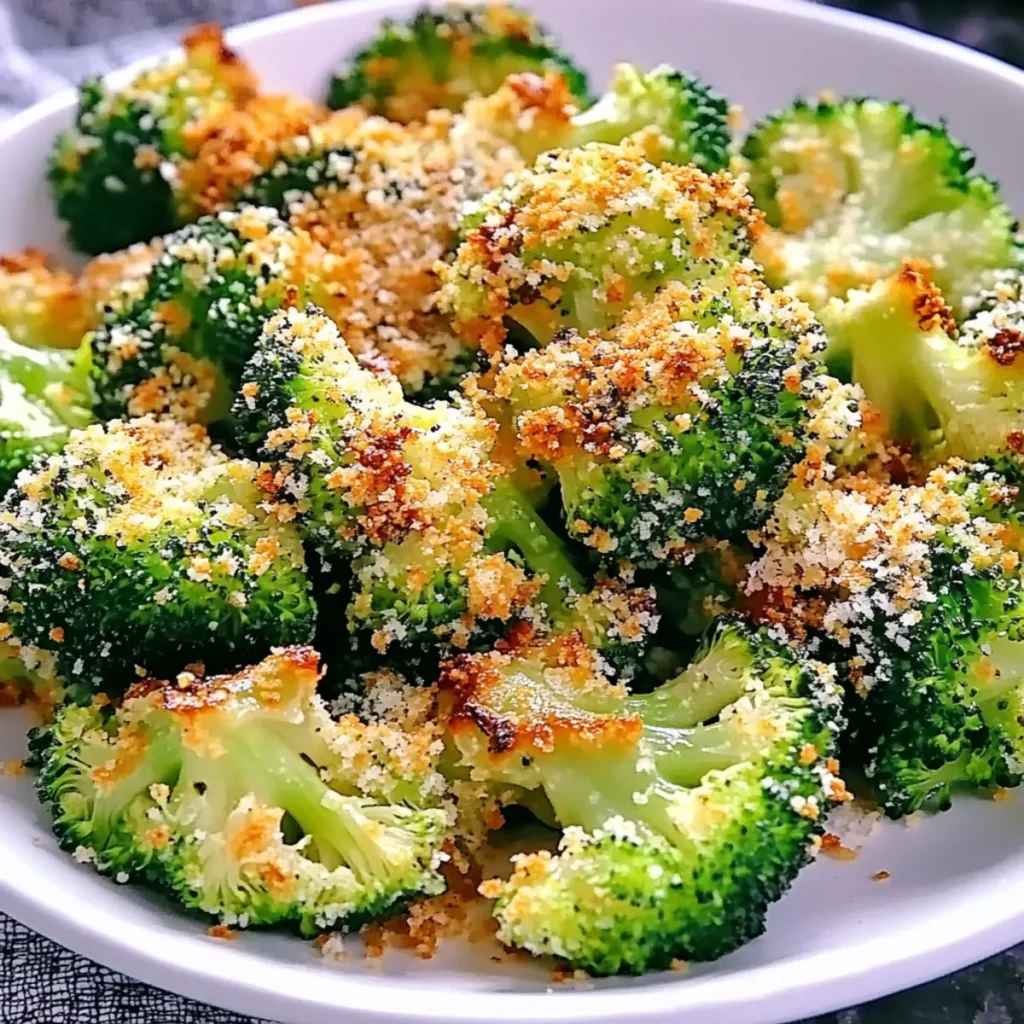
Parmesan Broccoli is that magical side dish that transforms the ordinary into extraordinary. Imagine tender, slightly crispy broccoli florets, topped with a golden layer of bubbly melted Parmesan that dances on your taste buds and engages your senses. This dish doesn