
Fresh Green Bean Casserole with Crispy Onions
Forget gummy canned soups and limp green beans—this ultimate fresh green bean casserole is a luxurious, from-scratch revelation that redefines America’s most iconic holiday side dish. Featuring crisp-tender fresh green beans enveloped in a deeply savory, velvety homemade garlic and cremini mushroom cream sauce, then baked until bubbling and crowned with a golden avalanche of shatteringly crisp fried onions, this crowd-pleaser elevates every Thanksgiving, Christmas, and Sunday dinner table. The magic behind this elevated classic lies in two simple chef techniques: blanch-shocking the fresh green beans and building a rich mushroom velouté from scratch. By boiling fresh green beans for just 4 minutes and immediately plunging them into an ice water bath, we lock in their bright emerald hue and crisp-tender bite so they never turn soggy in the oven. Meanwhile, searing browned cremini mushrooms with caramelized shallots, fresh thyme, and roasted garlic creates an umami-packed cream sauce infused with real dairy and vegetable broth that completely outperforms any condensed canned soup. Why You’ll Love This Recipe 100% From Scratch (Zero Canned Soup): Made with fresh mushrooms, real cream, garlic, and herbs for pure, unadulterated comfort food flavor. Never Mushy or Watery: Blanching and ice-shocking keeps the fresh beans vibrant green with a satisfying, tender-crisp snap. Make-Ahead Holiday Hero: Assemble the casserole up to 24 hours in advance, refrigerate, and bake with the crispy onion topping right before serving. 100% Halal Wholesome: Wholesome dairy, fresh garden produce, rich vegetable broth, and absolutely zero pork lard or bacon products. Key Ingredients & Smart Swaps Fresh ingredients arranged on a clean quartz workstation. Fresh Green Beans: Trimmed and cut into 2-inch pieces. Fresh green beans retain a vibrant crunch and sweet garden flavor that canned or frozen beans cannot duplicate. Cremini (Baby Bella) Mushrooms: Sliced and deeply browned to provide meaty texture and rich savory depth in the homemade cream sauce. White button mushrooms or wild mushrooms also work wonderfully. Shallots & Fresh Garlic: Diced shallots offer a sweet, mellow onion foundation, while minced garlic brings aromatic holiday warmth. Rich Vegetable or Poultry Bone Broth & Heavy Cream: Broth lends savory body while heavy cream adds rich, velvety silkiness without cloying starchiness. Aged Parmesan Cheese: Stirred into the warm mushroom sauce to provide nutty sharpness and natural thickening power. Crispy French Fried Onions: Half are folded into the casserole for savory onion flavor throughout, and half are baked on top for that iconic shatteringly crisp crunch. Step-by-Step Cooking Walkthrough 1. Blanch & Shock the Green Beans: Bring a large pot of heavily salted water to a rolling boil. Add trimmed green beans and cook for 4 to 5 minutes until tender-crisp and bright green. Immediately transfer with tongs to a large bowl filled with ice water to halt cooking. Drain thoroughly and pat dry with clean towels. 2. Brown the Mushrooms & Aromatics: In a deep skillet over medium-high heat, melt 2 tablespoons of butter. Add sliced cremini mushrooms and cook undisturbed for 4 minutes until deeply caramelized. Add diced shallots, minced garlic, and fresh thyme; sauté for 2 minutes until fragrant. Active stovetop cooking: folding tender blanched green beans directly into velvety garlic mushroom cream sauce. 3. Build the Homemade Velvet Sauce: Sprinkle 2 tablespoons of all-purpose flour over the mushrooms. Cook for 1 minute to remove raw flour taste. Slowly pour in 1 cup of rich broth and 1 cup of heavy cream, whisking continuously. Bring to a gentle simmer for 3 minutes until thick and glossy. Stir in grated Parmesan, salt, black pepper, and a pinch of ground nutmeg. 4. Combine & Transfer: Remove skillet from heat. Fold in the drained green beans and 1 cup of crispy fried onions until evenly coated in luscious sauce. Pour the mixture into a greased 9×13-inch baking dish. 5. Bake to Bubbly Perfection: Bake uncovered at 375°F (190°C) for 18 to 20 minutes until the edges are vigorously bubbling. Scatter the remaining 1 1/2 cups of crispy fried onions evenly over top and bake for another 4 to 5 minutes until golden-brown and fragrant. Let rest 5 minutes before serving. 3 Chef Secrets for Perfect Results 1. Always Shock in Ice Water: Do not skip the ice bath! Shocking the beans immediately stops residual heat from overcooking the delicate cell walls, preventing the grayish discoloration and mushy texture typical of canned casseroles. 2. Brown Mushrooms Undisturbed: Allow the sliced mushrooms to sear in hot butter without stirring for the first few minutes. Searing releases excess moisture and concentrates natural glutamates, creating deep savory umami. 3. Two-Stage Onion Addition: Folding some fried onions into the casserole infuses savory onion flavor throughout the sauce, while topping with fresh onions during the final 5 minutes ensures a delicate, ultra-crispy crunch that never gets soggy. What to Serve With Fresh Green Bean Casserole Served holiday-style with roast turkey breast, mashed potatoes, and artisan bread. Holiday Roast Mains: Juicy garlic herb roast turkey breast, slow-cooked prime rib, or glazed roasted chicken. Classic Holiday Sides: Ultra creamy roasted garlic mashed potatoes, traditional sausage herb stuffing, and sweet potato casserole. Warm Breads: Fluffy butter dinner rolls or warm honey cornbread for dipping into the rich mushroom sauce. Storage, Freezing & Reheating Instructions Make-Ahead Assembly: Prepare the casserole through step 4 (without the top onion layer). Cover tightly and refrigerate for up to 24 hours. When ready to bake, let sit at room temperature for 20 minutes, bake covered for 15 minutes, uncover for 10 minutes, then add crispy onions and finish. Refrigeration: Store leftover casserole in an airtight container for up to 3 to 4 days. Reheating for Crispness: Reheat leftovers in a 350°F oven for 10 to 12 minutes to revive the crispy onion topping. Avoid the microwave if you want to keep the onions crunchy! Frequently Asked Questions Can I use frozen green beans instead of fresh?Yes! If using frozen cut green beans, thaw them completely and pat thoroughly dry with paper towels before folding into the mushroom sauce. Skip the boiling step, as frozen beans
Crispy Sticky Honey Garlic Chicken Bites: 20-Min
When busy weeknights demand an effortless dinner that tastes like high-end takeout, these crispy sticky honey garlic chicken bites deliver in just 20 minutes flat. Tender, bite-sized chicken breast chunks are lightly dusted with cornstarch, seared until golden-crisp on the outside, and coated in a glossy, bubbly glaze made with pure clover honey, heaps of fresh minced garlic, and savory tamari. Every mouthful is a crave-worthy balance of sweet, savory, and garlicky perfection that clings tightly to fluffy steamed jasmine rice. The culinary secret to achieving that irresistible takeout-style texture at home lies in the quick cornstarch dusting and high-heat skillet sear. Tossing the chicken pieces in a light coat of cornstarch creates a delicate barrier that locks in moisture while forming micro-ridges on the surface. When seared in hot avocado oil, these ridges crisp up into a golden crust that acts like a sponge for the sauce. As the honey, garlic, chicken bone broth, and splash of apple cider vinegar reduce in the skillet, the natural starches pull the sauce into a clinging velvet glaze in under 90 seconds—no heavy flour roux or deep frying required. Why You’ll Love This Recipe True 20-Minute Weeknight Dinner: Fast prep and quick stovetop cooking get this family-friendly meal on the table in minutes. Better Than Takeout: Made with clean pantry ingredients, zero MSG, and far less sodium than restaurant versions. Ultra-Glossy Sauce Adhesion: The cornstarch coating ensures the sticky honey garlic glaze clings tenaciously to every single bite. 100% Halal Wholesome: Made with premium lean chicken breast, wholesome pure honey, fresh aromatics, and absolutely zero pork or alcohol. Key Ingredients & Smart Swaps Fresh ingredients arranged on a clean quartz workstation. Boneless Skinless Chicken Breasts: Cut into uniform 1-inch bite-sized cubes for even cooking and maximum surface area for sauce coating. Swap: Boneless skinless chicken thighs can be used for extra richness and succulence. Cornstarch: The secret to the delicate, crispy exterior shell that absorbs and holds onto the honey garlic glaze. Potato starch or tapioca starch also work seamlessly. Pure Clover Honey: Provides rich amber sweetness, natural thickness, and a mirror-like shine as it bubbles and caramelizes in the hot skillet. Fresh Minced Garlic & Grated Ginger: Freshly crushed garlic cloves and freshly grated ginger deliver bold, authentic aromatic punch that jarred garlic simply cannot match. Low-Sodium Tamari / Soy Sauce: Supplies deep umami foundation without overwhelming the dish with excess sodium. Tamari keeps the recipe naturally gluten-free friendly. Apple Cider Vinegar: Adds a crisp, tangy brightness that cuts through the honey’s sweetness, creating a balanced, restaurant-quality flavor profile. Toasted Sesame Oil & Seeds: A finishing drizzle of toasted sesame oil adds nutty fragrance, while toasted white sesame seeds offer delicate crunch. Step-by-Step Cooking Walkthrough 1. Prep & Coat Chicken: Pat the cubed chicken dry with paper towels. In a medium bowl, toss the chicken with 2 tablespoons of cornstarch, 1/2 teaspoon garlic powder, 1/2 teaspoon fine sea salt, and 1/4 teaspoon freshly cracked black pepper until evenly coated. 2. Whisk the Honey Garlic Sauce: In a measuring cup, whisk together pure clover honey, low-sodium tamari soy sauce, chicken bone broth, apple cider vinegar, minced garlic, grated ginger, and red pepper flakes until smooth. Active stovetop skillet cooking: tossing golden chicken bites as the honey garlic glaze thickens and bubbles. 3. Sear Chicken Bites to Golden Crisp: Heat 2 tablespoons of high-heat cooking oil in a large 12-inch nonstick or cast-iron skillet over medium-high heat. Add chicken pieces in a single layer without overcrowding. Sear for 3 to 4 minutes untouched until a golden crust develops, then flip and cook for another 2 to 3 minutes until cooked through. Transfer to a clean plate. 4. Bubble & Glaze: Lower the skillet heat to medium. Pour the whisked honey garlic sauce directly into the hot skillet. Let it bubble vigorously for 1 to 2 minutes, stirring with a wooden spoon as the honey caramelizes and thickens into a glossy glaze. 5. Toss & Finish: Return the crispy chicken bites to the skillet. Toss continuously for 60 seconds until every single bite is completely smothered in the sticky sauce. Drizzle with toasted sesame oil and remove from heat immediately. 6. Garnish & Serve: Sprinkle lavishly with toasted white sesame seeds and thinly sliced fresh green scallions. Serve piping hot over steamed jasmine rice or noodles! 3 Chef Secrets for Perfect Results 1. Do Not Overcrowd the Skillet: Cook the chicken bites in a single layer with space between each piece. If the pan is crowded, the chicken will steam instead of developing that crucial crispy golden crust. Cook in two batches if necessary! 2. Thicken Sauce Before Adding Chicken Back: Allow the honey garlic sauce to bubble and reduce in the skillet for a minute before reintroducing the chicken. This preserves the chicken’s crisp coating rather than soaking it in thin liquid. 3. Use Freshly Grated Ginger and Garlic: Fresh garlic and ginger contain natural juices and sharp aromatic oils that bloom instantly in the hot skillet, delivering tenfold more aroma than dried powders. What to Serve With Sticky Honey Garlic Chicken Served restaurant-style over fluffy steamed jasmine rice with crisp broccoli and fresh scallions. Grains & Starches: Steamed jasmine rice, brown rice, garlic fried rice, or tender lo mein egg noodles are ideal for capturing every drop of the sweet-savory glaze. Crisp Green Veggies: Steamed broccoli florets, stir-fried sugar snap peas, charred baby bok choy, or garlic roasted asparagus. Refreshing Sides: An Asian cucumber salad tossed in rice vinegar, sesame oil, and chili flakes provides a cool, tangy contrast to the warm sticky chicken. Storage, Freezing & Reheating Instructions Refrigeration: Store leftover honey garlic chicken in an airtight container in the refrigerator for up to 4 days. Pack separately from rice for optimal texture. Skillet or Air Fryer Reheating (Recommended): Reheat in a dry skillet over medium-low heat with a splash of water for 3 to 4 minutes until hot and glossy. Alternatively, crisp in an air fryer at 350°F for
Gooey Brown Butter Pecan Pie Bars: Easy Recipe
There are desserts that politely conclude a dinner, and then there are these gooey brown butter pecan pie bars—a rich, deeply caramelized autumn masterpiece featuring a melt-in-your-mouth shortbread crust loaded with toasted pecans and smothered in a bubbling amber maple caramel. Combining all the decadent, nutty richness of a traditional Southern pecan pie with the effortless portability and clean slicing of a bakery bar, this recipe is a proven holiday crowd-pleaser that comes together in just 45 minutes of total bake time. The secret that elevates these bars far above standard bakery squares is browning the butter before whisking the filling. Browning unsalted butter transforms plain milk solids into nutty, toasted golden flecks that infuse the caramel with rich butterscotch undertones. Instead of cloying light corn syrup, we rely on a harmonious blend of dark brown sugar, pure grade-A maple syrup, heavy cream, and Madagascar vanilla. When poured over a par-baked golden shortbread base and baked until bubbly, the filling sets into a fudgy, gooey custard crowned by crunchy roasted pecans. Why You’ll Love This Recipe Easier Than Rolling Pie Crust: Press-in buttery shortbread crust requires no rolling pins, chilling dough discs, or blind-baking pie weights. Unbeatable Nutty Aroma: Nutty brown butter and toasted whole pecans create an unforgettable aroma that fills the entire home as it bakes. Perfect Make-Ahead Holiday Dessert: These bars slice cleanly at room temperature and taste even richer the second day, making Thanksgiving prep stress-free. 100% Halal Wholesome: Made with pure creamery butter, wholesome grade-A maple syrup, fresh farm eggs, and zero alcohol or artificial extracts. Key Ingredients & Smart Swaps Fresh baking ingredients arranged on a clean quartz workstation. Whole Raw Pecan Halves: Plump, fresh pecans provide the signature snap and earthy sweetness. Coarsely chop half for dense distribution while keeping half whole for an artisanal top pattern. Unsalted Butter (Browned): Divided between the shortbread crust and the caramel filling. Browning creates nutty melanoidin compounds that provide unmatched flavor depth. Dark Brown Sugar & Pure Maple Syrup: Supplies deep molasses richness and warm autumn notes without the need for processed light corn syrup. Heavy Whipping Cream: Creates a silky, melt-in-your-mouth emulsion that gives the filling its iconic gooey chew. Flaky Maldon Sea Salt: A gentle sprinkle across the warm caramel provides crucial contrast that cuts through the rich sweetness. All-Purpose Flour & Powdered Sugar: The foundation of the press-in shortbread; powdered sugar yields a tender, melt-away crumb that stays crisp beneath the gooey filling. Step-by-Step Cooking Walkthrough 1. Par-Bake the Shortbread Crust: Preheat oven to 350°F (175°C). Line a 9×13-inch metal baking pan with parchment paper, leaving an overhang on the sides for easy lifting. In a bowl, whisk melted butter, powdered sugar, flour, and a pinch of salt until a soft dough forms. Press evenly into the bottom of the pan and prick lightly with a fork. Bake for 18 to 20 minutes until pale golden around the edges. 2. Brown the Butter: In a medium saucepan over medium heat, melt 1/2 cup of unsalted butter. Swirl gently as it foams and crackles. After 4 to 5 minutes, golden-brown specks will appear at the bottom with a distinct hazelnut aroma. Immediately remove from heat and transfer to a mixing bowl. Pouring the fragrant brown butter and caramelized pecan filling evenly over the warm shortbread base. 3. Whisk Caramel Filling: Whisk dark brown sugar, pure maple syrup, heavy cream, vanilla extract, and salt into the warm brown butter until smooth and glossy. Whisk in the eggs one at a time until completely emulsified. Fold in the pecans. 4. Pour & Bake to Perfection: Pour the pecan filling evenly over the warm par-baked shortbread crust. Smooth with an offset spatula. Return pan to the oven and bake at 350°F for 24 to 28 minutes, until the filling is bubbly around the edges with a gentle, set wobble in the center. 5. Sea Salt & Complete Cool: Remove from the oven and immediately scatter flaky Maldon sea salt over the top. Allow bars to cool completely in the pan on a wire rack for at least 2 hours, then refrigerate for 1 hour for clean, razor-sharp bakery squares. 3 Chef Secrets for Perfect Results 1. Watch the Brown Butter Closely: Butter transitions from foaming gold to browned perfection in less than 60 seconds. As soon as you smell a rich hazelnut aroma and see dark amber flecks, pour it out of the hot pan immediately to prevent bitter burning. 2. Pour Over a Warm Crust: Always pour the gooey pecan caramel over the shortbread base while it is still warm from its par-bake. This seals the crust and prevents any sogginess, guaranteeing a crisp snap in every bite. 3. Chill Before Slicing: While it is tempting to cut warm bars, the maple caramel filling requires cooling to fully set. Chilling for 60 minutes makes slicing effortless without sticky residue pulling on your knife blade. What to Serve With Brown Butter Pecan Pie Bars Served dessert-style with roasted pecans, flaky sea salt, and a fresh cup of artisan coffee. Ice Cream & Whipped Cream: Serve slightly warmed with a generous scoop of vanilla bean ice cream or fresh homemade chantilly cream. Hot Beverages: Pairs sublimely with freshly brewed dark roast coffee, an espresso cortado, or spiced autumn chai tea. Holiday Dessert Platters: Present alongside cinnamon apple cider donuts and pumpkin spice cheesecake squares for a stunning Thanksgiving dessert buffet. Storage, Freezing & Reheating Instructions Room Temperature & Refrigeration: Store sliced bars in an airtight container separated by parchment paper at room temperature for up to 4 days, or refrigerated for up to 1 week. Freezing Instructions: These bars freeze exceptionally well! Wrap individually in plastic wrap, then store inside a freezer-safe zip-top bag for up to 3 months. Thaw overnight in the refrigerator. Serving Temperature: Delicious enjoyed chilled straight from the fridge for a chewy candy-like texture, or warmed in a 300°F oven for 5 minutes for an ultra-gooey pie experience. Frequently Asked Questions Can I
One-Pot Creamy Cajun Chicken Pasta: Easy 25-Min Dinner
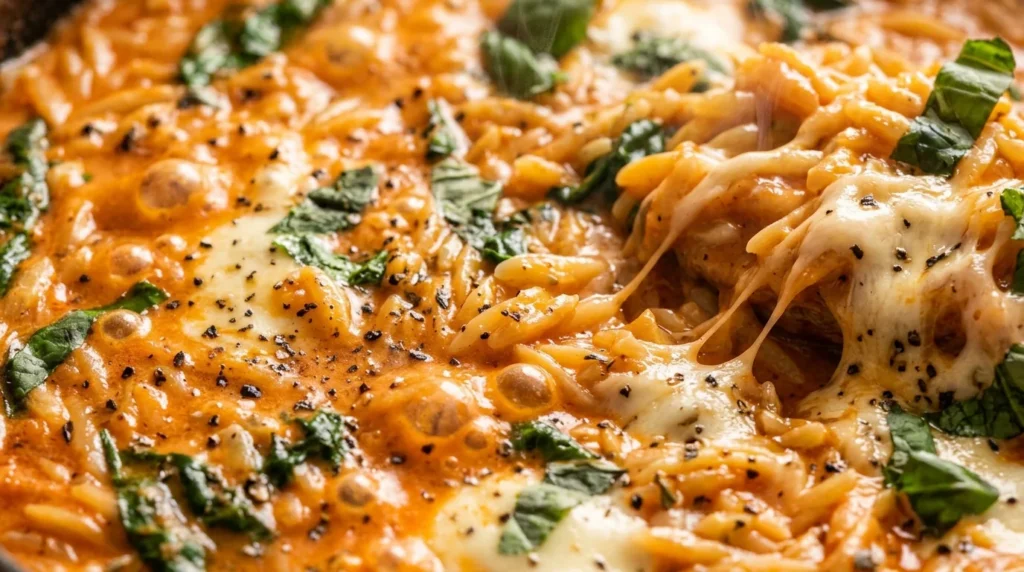
There are weeknight pasta dinners, and then there is this showstopping one-pot creamy Cajun chicken pasta—a bold, soul-satisfying meal packed with tender blackened chicken strips, crisp sweet bell peppers, and ridged penne coated in a velvety, spice-infused cream sauce. Prepared entirely in a single skillet in just 25 minutes, the dry pasta simmers directly in rich chicken bone broth, absorbing savory flavor into every starch grain while natural starches thicken the sauce into restaurant-grade velvet. It is comforting, zesty, and guaranteed to become an instant family favorite. The true genius of the one-pot pasta method lies in starch concentration. When pasta is boiled in a huge pot of salted water and drained, all the valuable surface starches are washed down the sink. By cooking the penne directly in a measured bath of savory chicken bone broth and cream, the pasta releases its natural starches straight into the liquid. As the broth reduces, these starches emulsify seamlessly with softened cream cheese and freshly grated aged Parmesan, creating a glossy, cling-to-every-ridge Cajun cream sauce without needing any heavy flour roux. The blackened, pan-seared chicken breast is stirred back in at the very end, keeping the meat succulent and juicy with a delicate spicy crust. Why You’ll Love This Recipe True 25-Minute Weeknight Speed: No waiting for a separate pot of water to boil; everything cooks swiftly from start to finish in one deep skillet. Incredible Sauce Adhesion: Cooking the pasta directly in the broth infuses the penne with flavor from the inside out and yields an ultra-velvety sauce. Customizable Mild-to-Bold Heat: Easily adjust the cayenne pepper in your Cajun blend to suit sensitive family palates or bold spice lovers. 100% Halal Wholesome: Made with fresh chicken breast cutlets, wholesome dairy, crisp garden peppers, and absolutely zero pork or alcohol. Key Ingredients & Smart Swaps Fresh ingredients arranged on a clean quartz workstation. Boneless Skinless Chicken Breasts: Sliced into thin strips so they sear rapidly and develop a deep caramelized spice crust in under 6 minutes. Swap: Boneless chicken thighs can also be used for extra richness. Cajun Spice Blend: A fragrant mix of smoked paprika, garlic powder, onion powder, dried oregano, thyme, sea salt, black pepper, and cayenne. Using a homemade or low-sodium blend gives you total control over sodium and spice levels. Ridged Penne Rigate: The exterior ridges and hollow centers of penne catch and hold the luscious Cajun sauce perfectly. Rotini or rigatoni are great alternatives. Trio of Sweet Bell Peppers & Onions: Sliced red and yellow bell peppers provide crisp-tender texture and natural sweetness that balances the smoky Cajun heat. Rich Chicken Bone Broth & Heavy Cream: Broth cooks the pasta to al dente perfection, while heavy cream and softened cream cheese provide silky body and rich dairy mellowing. Aged Parmesan Cheese: Always freshly grated from a block to melt smoothly into the hot sauce without graininess. Step-by-Step Cooking Walkthrough 1. Season & Sear the Chicken: Slice chicken breasts into bite-sized strips. Toss with 1 tablespoon of Cajun seasoning and 1/2 teaspoon salt. Heat 1 tablespoon olive oil in a deep 12-inch skillet over medium-high heat. Sear the chicken for 5 to 6 minutes until golden-brown and blackened at the edges. Transfer to a clean plate. 2. Sauté Aromatics & Peppers: In the same skillet, melt 1 tablespoon butter. Add the sliced bell peppers, diced onion, and 1/2 teaspoon Cajun seasoning. Sauté for 3 to 4 minutes until peppers are vibrant and slightly tender. Add minced garlic; cook for 1 minute until fragrant. Active stovetop cooking: simmering tender penne directly in rich chicken bone broth and cream. 3. Simmer Pasta One-Pot: Pour in the chicken bone broth, heavy cream, and uncooked penne pasta. Stir well, pressing the pasta submerged into the liquid. Bring to a vigorous boil, then cover with a tight-fitting lid, reduce heat to medium-low, and simmer for 10 to 12 minutes, stirring every few minutes to prevent sticking. 4. Melt Cheeses into Velvet: Remove the lid. The pasta should be tender al dente and the liquid reduced into a creamy sauce. Stir in the softened cream cheese and freshly grated Parmesan until completely melted and glossy. 5. Reincorporate Chicken: Add the cooked blackened chicken and any resting juices back into the skillet. Toss everything together for 1 to 2 minutes over low heat until heated through. 6. Garnish & Serve: Remove from heat. Scatter thinly sliced green scallions and chopped fresh parsley over top. Serve immediately in wide pasta bowls with extra Parmesan! 3 Chef Secrets for Perfect Results 1. Sear Chicken First, Don’t Boil It in Sauce: Searing the chicken at high heat first creates crucial caramelized fond on the bottom of the skillet and gives the chicken that signature blackened restaurant crust. Adding it back at the end keeps the chicken remarkably juicy and tender. 2. Stir Frequently During the Simmer: Because pasta releases starches as it cooks in a concentrated amount of liquid, stir the skillet every 2 to 3 minutes to keep the pasta tubes from sticking to each other or the pan bottom. 3. Use Room Temperature Cream Cheese: Adding cold cream cheese directly from the fridge can cause it to break or curdle. Ensure it is soft and cubed so it melts instantly into a silky, emulsified sauce. What to Serve With Creamy Cajun Chicken Pasta Served bistro-style with warm garlic bread, freshly grated Parmesan, and crisp green onions. Warm Breads: Crusty toasted garlic bread or warm herb focaccia is essential for scooping up the velvety Cajun cream sauce. Crisp Fresh Salads: A refreshing Caesar salad with crisp romaine and crunchy croutons or a garden green salad with lemon vinaigrette to cut through the richness. Roasted Vegetables: Charred broccolini, roasted asparagus spears, or honey-glazed baby carrots. Storage, Freezing & Reheating Instructions Refrigeration: Store leftover pasta in an airtight glass container for up to 3 to 4 days. The pasta continues to absorb sauce as it chills, so keep a splash of broth or cream handy for reheating. Gentle Stovetop
Roasted Garlic Butternut Squash Soup: Easy & Velvety
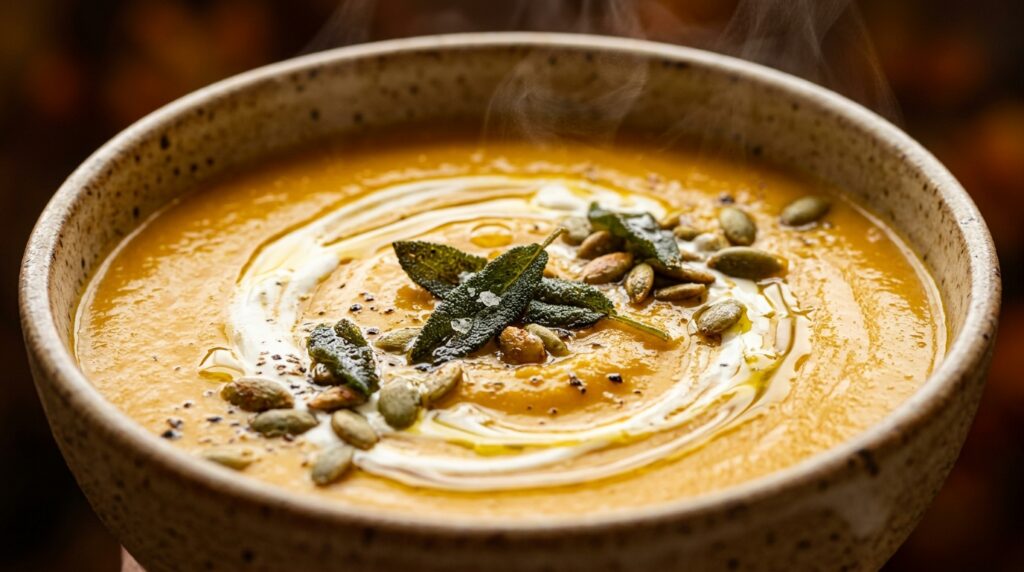
As autumn leaves turn and crisp evening air settles in, nothing captures the cozy magic of the season quite like a steaming bowl of roasted garlic butternut squash soup. Roasted until deeply caramelized and blended into an impossibly velvety, golden silk, this soul-warming soup marries the natural nutty sweetness of winter squash with mellow, buttery roasted garlic and fragrant garden sage. Finished with a swirl of rich sweet cream and crunchy toasted pepitas, it delivers bistro-caliber elegance straight to your weeknight dinner table. While many quick butternut squash soups are simply boiled in broth, true culinary depth comes from the high-heat Maillard reaction of oven roasting. Tossing cubed butternut squash in olive oil and roasting at 400°F (200°C) evaporates excess water while caramelizing the natural fruit sugars, converting raw squash into intense, concentrated sweetness with craggy toasted edges. Roasting a whole head of garlic right alongside transforms sharp, pungent cloves into sweet, spreadable golden garlic butter. When simmered together with rich broth, a tart Granny Smith apple for bright balance, and a pinch of freshly grated nutmeg, blending produces an emulsified texture so decadent and smooth you will never look at canned soup again. Why You’ll Love This Recipe Intense Caramelized Depth: Oven-roasting the squash and garlic deepens the savory-sweet flavor tenfold compared to basic stovetop boiling. Ultra-Silky Velvety Texture: Naturally thick and luscious without adding any flour, starches, or heavy fillers. Make-Ahead & Freezer Friendly: The flavors meld and taste even richer the next day, making it the perfect holiday prep or weeknight batch meal. 100% Halal Wholesome: Crafted with pure farm vegetables, real dairy cream, clean wholesome bone broth, and zero alcohol. Key Ingredients & Smart Swaps Fresh ingredients arranged on a clean quartz workstation. Fresh Butternut Squash: Choose a firm squash with matte beige skin that feels heavy for its size. Peeling and cubing before roasting ensures maximum surface area for golden caramelization. Pro Hack: High-quality pre-cut raw squash cubes save 15 minutes of prep time! Whole Head of Roasted Garlic: Roasting the entire garlic head in foil turns the cloves sweet, mild, and buttery, infusing the soup with umami depth without harsh garlic bite. Granny Smith Apple: A secret weapon in autumn soups! The crisp malic acidity of half a green apple perfectly balances the rich squash sweetness without making the soup taste like dessert. Rich Vegetable or Poultry Bone Broth: Provides a savory savory foundation. Using rich bone broth adds natural body and wholesome collagen. Heavy Cream or Coconut Cream: Half a cup of sweet cream adds luxurious gloss and velvet body. For a dairy-free or vegan version, full-fat unsweetened coconut cream works seamlessly. Warm Autumn Spices (Sage, Nutmeg & Ginger): Fresh garden sage provides earthy herbal perfume, while ground ginger and freshly grated whole nutmeg impart comforting holiday warmth. Step-by-Step Cooking Walkthrough 1. Roast Squash & Garlic: Preheat oven to 400°F (200°C). Spread cubed butternut squash across a large baking sheet, drizzle with olive oil, salt, and pepper. Slice the top 1/4-inch off a whole head of garlic, drizzle with oil, wrap in foil, and place on the sheet. Roast for 30 to 35 minutes until the squash is fork-tender with caramelized edges and the garlic is golden and soft. 2. Sauté Aromatics: In a large Dutch oven, melt 2 tablespoons of butter over medium heat. Add diced yellow onion, diced Granny Smith apple, and fresh chopped sage. Sauté for 6 to 8 minutes until soft and fragrant. Active autumn cooking: puréeing roasted squash and sweet garlic cloves into a velvety golden soup. 3. Combine & Simmer: Transfer the caramelized roasted squash into the Dutch oven. Squeeze the soft roasted garlic cloves straight out of their papery skins into the pot. Pour in the broth, ground ginger, nutmeg, and a pinch of cinnamon. Bring to a gentle boil, then simmer uncovered for 10 minutes to let the flavors marry. 4. Purée to Velvety Silk: Use an immersion stick blender directly in the pot (or transfer in careful batches to a high-speed blender) and purée on high speed for 2 to 3 minutes until completely smooth and velvety. 5. Swirl in Cream & Season: Reduce heat to low. Stir in the heavy cream. Taste and adjust seasoning with additional sea salt and freshly cracked black pepper. Simmer for 2 minutes until hot and glossy. 6. Ladle & Garnish: Ladle into warm bowls. Drizzle with extra cream and olive oil, scatter toasted salted pepitas and crisp sage leaves over top, and serve piping hot with crusty sourdough bread! 3 Chef Secrets for Perfect Results 1. Caramelize, Do Not Just Soften: Don’t crowd your baking sheet when roasting squash. Giving the cubes space ensures they roast and caramelize rather than steam, creating deep golden fond that gives the soup its intoxicating nutty flavor. 2. Use a High-Speed Blender for True Velvet Texture: An immersion blender does a great job, but transferring the soup to a high-powered countertop blender (like a Vitamix) aerates and emulsifies the squash fibers into ultra-luxurious, five-star restaurant velvet. 3. Never Skip the Acidic Balance: Pure butternut squash can sometimes taste flat or overly sweet. Sautéing a tart Granny Smith apple or adding a splash of fresh lemon juice at the end cuts the starchiness and awakens every autumnal flavor. What to Serve With Roasted Butternut Squash Soup Served cozy bistro-style with grilled sourdough bread, cream heart swirl, and crunchy pepitas. Warm Artisan Breads: Crusty grilled sourdough, warm garlic baguette slices, or homemade buttery brioche rolls for dipping into the velvety broth. Crisp Autumn Salads: An apple pecan arugula salad tossed with crumbled goat cheese and apple cider vinaigrette. Holiday Table Centerpiece: Serves as an elegant starter for Thanksgiving or holiday dinner alongside roast turkey breast, herb stuffing, and cranberry sauce. Storage, Freezing & Reheating Instructions Refrigeration: Let the soup cool completely, then transfer to an airtight container. Refrigerate for up to 4 to 5 days. It reheats beautifully and thickens slightly as it rests. Freezing Guidelines: This soup freezes exceptionally well! For
Sheet Pan Garlic Butter Salmon with Asparagus: 20-Min
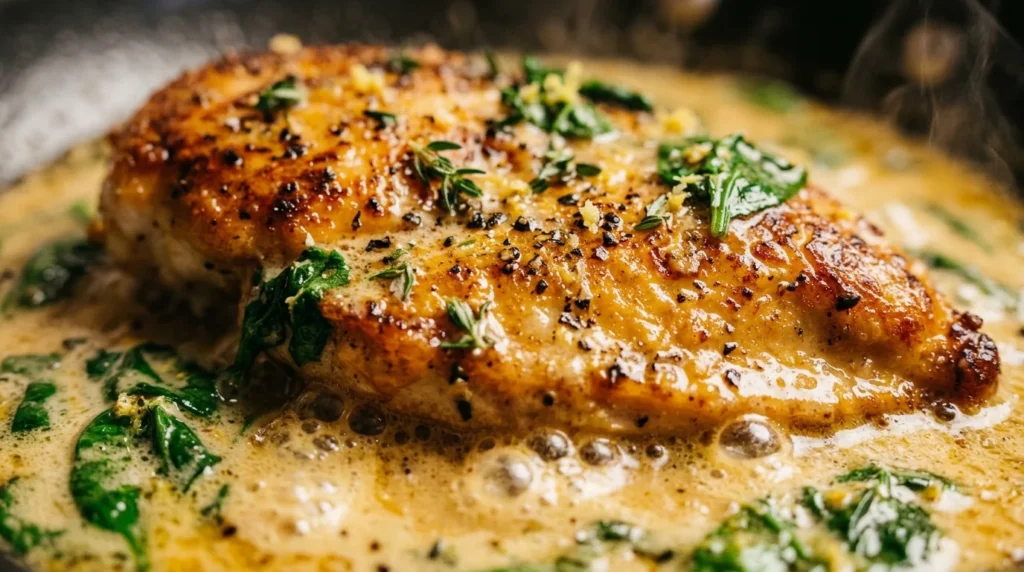
When you crave an elegant, restaurant-caliber seafood dinner but only have 20 minutes to spare, this sheet pan garlic butter salmon with crisp-tender asparagus is your ultimate weeknight savior. Featuring succulent, flaky salmon fillets basted in luscious melted garlic herb butter and caramelized lemon slices, everything roasts together on a single baking sheet for effortless cooking and virtually zero cleanup. It is vibrant, wholesome, and bursting with rich buttery citrus flavor in every fork-tender bite. The secret to achieving perfectly moist, melt-in-your-mouth baked salmon without drying out the delicate fish lies in high-heat roasting paired with a protective emulsion of butter and olive oil. Cooking salmon at 400°F (200°C) swiftly seals in natural juices while keeping the exterior delicately caramelized. Tossing the slender asparagus spears in a touch of extra virgin olive oil ensures they achieve charred, nutty tips while roasting at the exact same pace as the salmon fillets. Finishing the pan with fresh chopped garden dill and a squeeze of warm roasted lemon elevates this simple sheet pan meal into an unforgettable gourmet centerpiece. Why You’ll Love This Recipe Effortless 20-Minute Dinner: From trimming the asparagus to pulling the sizzling tray from the oven, dinner is completely ready in just 20 minutes. True One-Pan Simplicity: Both your protein and green vegetable cook side-by-side on one parchment-lined sheet pan for the easiest weeknight cleanup imaginable. Rich Flaky Texture: The garlic herb butter locks in natural moisture, guaranteeing flaky, fork-tender salmon with zero dry edges. 100% Halal Wholesome: Made with pristine fresh seafood, farm-fresh dairy butter, aromatic herbs, and zero alcohol deglazing. Key Ingredients & Smart Swaps Fresh ingredients arranged on a clean quartz workstation. Fresh Salmon Fillets: Choose center-cut fillets of similar thickness (roughly 6 ounces each) so they cook at an even rate. Skin-on salmon holds together best during roasting, though skinless fillets work equally well. Fresh Slender Asparagus: Look for bright green, medium-to-slender stalks. Slender asparagus roasts tender-crisp in 12 to 14 minutes, perfectly matching the salmon’s cooking time. Snap off the woody fibrous bottoms before roasting. Unsalted Butter & Olive Oil Blend: Butter introduces rich savory flavor that complements the rich omega-3 oils in salmon, while extra virgin olive oil raises the smoke point to prevent the butter from scorching in the hot oven. Fresh Garlic & Lemon: Four cloves of finely minced garlic infuse the warm butter. Fresh lemon juice cuts through the richness, while roasted lemon wheels caramelize into sweet citrus garnish. Fresh Herbs (Dill & Parsley): Dill is the classic botanical soulmate of roasted salmon, providing clean anise-like freshness, while flat-leaf parsley brings vibrant herbal color. Step-by-Step Cooking Walkthrough 1. Prep the Oven & Sheet Pan: Preheat your oven to 400°F (200°C). Line a large rimmed baking sheet with parchment paper or heavy-duty aluminum foil for easy cleanup. 2. Whisk the Garlic Herb Butter: In a small bowl, whisk together the melted unsalted butter, olive oil, minced garlic, 1 tablespoon of fresh lemon juice, chopped dill, parsley, sea salt, black pepper, and a pinch of smoked paprika. Active preparation: generously brushing rich garlic herb butter over salmon fillets and fresh asparagus. 3. Arrange Salmon & Asparagus: Place the salmon fillets in the center of the baking sheet skin-side down, leaving space between them. Arrange the trimmed asparagus stalks along the sides in a single layer. Tuck fresh lemon slices between the fillets. 4. Generously Glaze: Using a pastry brush or spoon, generously brush two-thirds of the garlic herb butter mixture over the salmon fillets and drizzle the remainder over the asparagus, tossing the asparagus gently to coat evenly. 5. Roast to Perfection: Bake at 400°F (200°C) for 12 to 14 minutes, depending on the thickness of your fillets. The salmon is done when it flakes easily with a fork and the internal temperature reaches 125°F (52°C) for medium or 135°F for medium-well. 6. Optional Broil & Garnish: For appetizing caramelized edges, switch the oven to BROIL for the final 60 to 90 seconds, watching closely. Spoon any buttery pan juices back over the salmon, sprinkle with fresh dill, and serve immediately! 3 Chef Secrets for Perfect Results 1. Snap the Asparagus Naturally: Do not guess where to cut asparagus with a knife. Hold the bottom third of a spear with both hands and bend gently; it will naturally snap at the exact point where the tender stalk meets the tough, woody stem. 2. Do Not Overcook Salmon: Salmon continues to cook for several minutes after being removed from the hot sheet pan due to residual heat. Pull it from the oven when the center is slightly translucent pink; it will finish cooking into tender perfection while resting. 3. Use Both Butter and Olive Oil: Pure butter contains milk solids that can burn at 400°F. Blending melted butter with olive oil raises the overall heat tolerance while preserving the luxurious buttery flavor we love. What to Serve With Garlic Butter Salmon Served restaurant-style with charred asparagus spears, fresh lemon, and steamed herb jasmine rice. Fluffy Grains: Steamed lemon herb jasmine rice, garlic quinoa, or fluffy couscous soak up every drop of aromatic pan drippings. Crisp Fresh Salads: A refreshing Mediterranean cucumber tomato salad or a crisp arugula salad with shaved Parmesan and lemon vinaigrette. Artisan Breads: Warm crusty sourdough bread or garlic focaccia to mop up the savory garlic butter pan juices. Storage, Freezing & Reheating Instructions Refrigeration: Store leftover cooked salmon and asparagus in an airtight glass container in the refrigerator for up to 3 days. Gentle Oven Reheating (Best Quality): Avoid high heat or microwave reheating, which turns salmon rubbery and emits a strong fishy odor. Reheat gently in a 300°F (150°C) oven or toaster oven for 8 to 10 minutes until warmed through. Cold Leftover Hack: Flake cold leftover roasted salmon directly over lunch salads, grain bowls, or fold into scrambled eggs for a gourmet breakfast! Frequently Asked Questions Can I use frozen salmon fillets?Yes, but thaw them completely overnight in the refrigerator first. Pat the thawed fillets completely dry
Classic Sausage Herb Stuffing: Easy Holiday Side
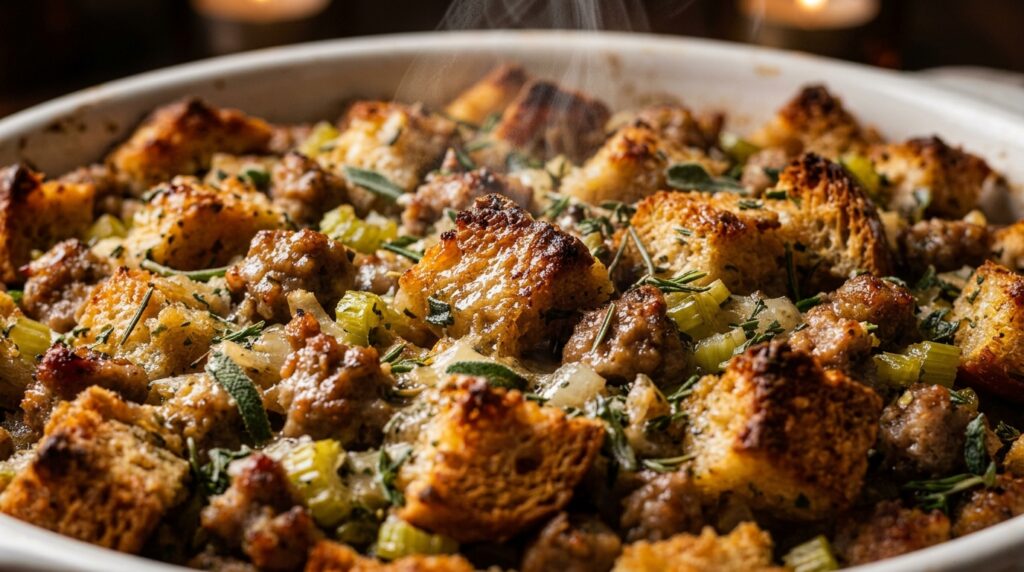
No holiday feast or Thanksgiving table is truly complete without the comforting aroma of a classic sausage and herb stuffing baking to golden perfection in the oven. Featuring a crispy, craggy, deep-golden crust on top with an impossibly tender, custardy herb-soaked center, this traditional stuffing brings savory luxury to every bite. Made with savory browned halal turkey sausage, sweet sautéed celery and onions, fragrant garden herbs, and rich poultry bone broth, it is the quintessential showstopper side dish guaranteed to earn rave reviews from your family and guests. The hallmark of truly extraordinary stuffing lies in balancing contrasting textures—avoiding the two common holiday pitfalls of dry, stale croutons or heavy, soggy mush. The secret begins with oven-drying rustic artisan bread cubes until completely moisture-free yet pale. By slowly dehydrating the bread rather than browning it initially, the dried crumb acts like a thirsty sponge, eagerly drinking in the rich poultry bone broth, melted sweet cream butter, and beaten eggs without dissolving into paste. When combined with caramelized browned turkey sausage and generous handfuls of fresh aromatic sage and rosemary, the stuffing bakes covered until custardy and steaming, then finishes uncovered until the peaks turn delightfully crackly and golden. Why You’ll Love This Recipe The Ultimate Texture Harmony: Shatteringly crisp, buttery golden croutons on top paired with a rich, melt-in-your-mouth savory center. Make-Ahead Holiday Convenience: Assemble the entire casserole the night before, cover, refrigerate, and bake fresh right before dinner. Deep Aromatic Flavor: Generous measures of fresh sage, rosemary, and thyme provide quintessential holiday perfume that fills your entire kitchen. 100% Halal Wholesome: Prepared with seasoned halal Italian-style turkey sausage, wholesome poultry bone broth, and pure butter with absolutely zero pork or alcohol. Key Ingredients & Smart Swaps Fresh ingredients arranged on a clean quartz workstation. Rustic Artisan Bread Cubes: A mix of rustic sourdough and country white bread provides sturdy structure and craggy texture. Cut into 3/4-inch cubes and bake at 300°F (150°C) for 20 minutes to thoroughly dry out. Halal Italian Turkey Sausage: Ground turkey sausage seasoned with fennel, garlic, and herbs adds rich savory depth without excessive grease. Brown thoroughly in a skillet before mixing. Celery & Sweet Yellow Onion: The classic aromatic foundation. Sauté gently in butter until tender and sweet; raw celery will not soften adequately during baking. Fresh Poultry Herb Blend (Sage, Rosemary & Thyme): Fresh herbs are essential here. Dried herbs tend to taste dusty, whereas finely minced fresh sage leaves and rosemary needles infuse the bread with clean woodsy aromatics. Rich Poultry Bone Broth: Rich, low-sodium chicken or turkey bone broth provides natural gelatin, savory moisture, and authentic holiday depth. Farm-Fresh Eggs: Two beaten eggs act as a delicate binder, creating a light, custardy interior crumb that holds together beautifully when scooped. Step-by-Step Cooking Walkthrough 1. Dry the Bread Cubes: Preheat your oven to 300°F (150°C). Spread bread cubes across two large rimmed baking sheets in a single layer. Bake for 18 to 22 minutes, tossing halfway, until dry and firm to the touch. Transfer to a very large mixing bowl. 2. Brown the Turkey Sausage: Heat 1 tablespoon of olive oil in a large skillet over medium-high heat. Add the halal turkey sausage and break it up with a wooden spoon into bite-sized crumbles. Cook for 6 to 8 minutes until deep golden-brown and caramelized. Transfer to the bowl with bread cubes using a slotted spoon. Active holiday preparation: gently folding toasted bread cubes with browned sausage, buttered aromatics, and rich warm poultry broth. 3. Sauté Aromatics & Herbs: In the same skillet, melt 6 tablespoons of unsalted butter over medium heat. Add diced onions, celery, salt, and pepper. Sauté for 8 to 10 minutes until soft and translucent. Stir in minced garlic, fresh sage, rosemary, and thyme; cook for 1 minute until fragrant. Pour directly over the bread and sausage. 4. Moisten & Bind: In a measuring cup, whisk together the poultry bone broth and beaten eggs. Pour 2 1/2 cups of the broth mixture over the bread mixture. Gently toss with a large wooden spoon until the bread has absorbed the liquid evenly. The cubes should be moist but not disintegrating into mush. 5. Bake Covered, Then Crisp: Transfer the mixture to a buttered 9×13-inch baking dish. Dot the top with the remaining 2 tablespoons of butter. Cover tightly with foil and bake at 375°F (190°C) for 30 minutes. Remove the foil and continue baking for 20 to 25 minutes until the top is deeply golden and crackly crisp. 6. Rest & Garnish: Allow the stuffing to rest for 10 minutes before serving so the custard sets slightly. Garnish with fresh parsley and sage sprigs, then serve hot! 3 Chef Secrets for Perfect Results 1. Dry the Bread in the Oven, Don’t Leave It on the Counter: Leaving bread out overnight merely creates stale bread that retains interior moisture. Slow oven-drying at 300°F dehydrates the bread completely to the core, allowing it to soak up broth like a sponge without turning gummy. 2. Whisk Eggs Directly into the Cooled Broth: Never pour raw eggs straight into a bowl of hot sautéed onions and celery, or you will scramble them. Whisk the eggs into room-temperature broth first, creating an even custard wash that distributes uniformly through every bread cube. 3. Two-Stage Baking is Essential: Baking covered with foil for the first 30 minutes traps steam, cooking the egg custard and ensuring the center becomes melt-in-your-mouth tender. Uncovering for the final 20 minutes allows the surface moisture to evaporate, yielding those irresistible crunchy buttery crouton edges. What to Serve With Sausage Herb Stuffing Served holiday-style with carved roast turkey, rich savory gravy, and tart cranberry sauce. Holiday Mains: The ultimate partner for juicy roast turkey breast, slow cooker beef pot roast, or whole roasted herb chicken. Rich Gravies & Sauces: Smother with homemade giblet gravy, roasted garlic pan jus, or tart spiced cranberry orange sauce. Festive Sides: Pair alongside ultra-creamy garlic mashed potatoes, brown butter whipped sweet potato casserole, or roasted
Cozy Creamy White Chicken Chili: 30-Min Dinner
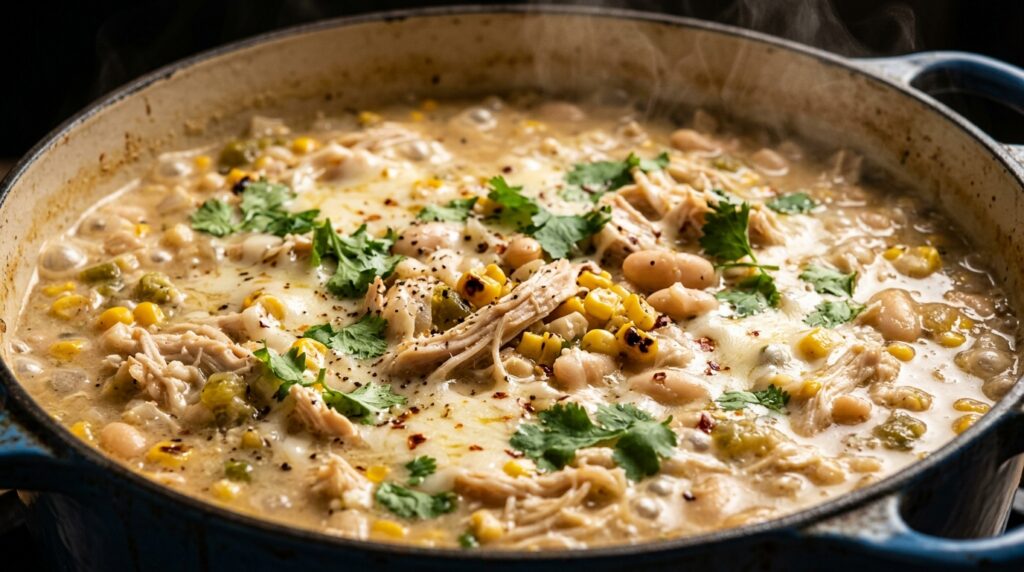
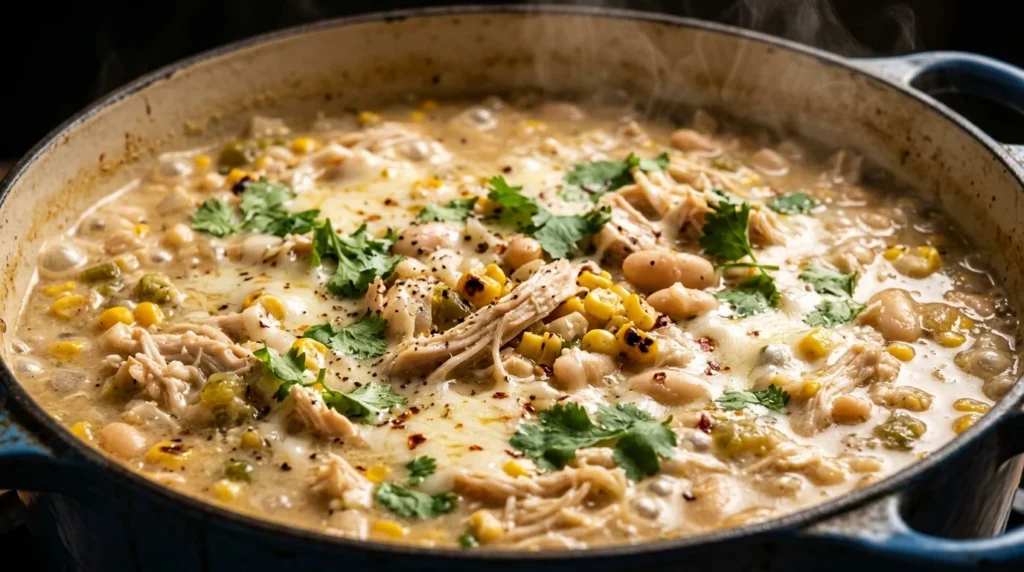
When brisk autumn evenings call for instant comfort, nothing warms the soul quite like a steaming bowl of creamy white chicken chili ladled rich and thick with shredded tender chicken, velvety cannellini beans, and sweet fire-roasted corn. Simmered to perfection in just 30 minutes in a single pot, this hearty Southwestern-inspired dinner strikes the ultimate balance between velvety dairy richness, zesty mild green chilies, and fragrant ground cumin. It is creamy comfort food elevated to restaurant caliber, without spending hours over a simmering stove. Unlike traditional beef-and-tomato chili, the luxurious texture of white chicken chili relies on a clever two-part thickening method rather than heavy flour roux. First, a portion of the tender cannellini beans is gently mashed directly against the pot wall or blended with a splash of warm chicken bone broth, releasing natural starches that create an authentic, full-bodied soup base. Second, stirring in softened cream cheese and freshly grated Monterey Jack at the very end of cooking yields a glossy, emulsified broth that wraps around every shred of juicy chicken breast. The bright acidity of freshly squeezed lime juice cuts through the rich dairy, ensuring every spoonful tastes vibrant and balanced. Why You’ll Love This Recipe Velvety Comfort in 30 Minutes: Utilizing tender pre-cooked shredded chicken cuts simmer time dramatically while delivering all-day slow-simmered flavor. Effortless One-Pot Clean Up: Sauté your aromatics and simmer the entire creamy chili in a single Dutch oven or soup pot for minimal dishwashing. Naturally Thick & Creamy: Mashing a portion of the white beans creates incredible body naturally without cornstarch or flour slurries. 100% Halal Wholesome: Prepared with clean ingredients, rich chicken bone broth, wholesome dairy, and zero alcohol or pork derivatives. Key Ingredients & Smart Swaps Fresh ingredients arranged on a clean quartz workstation. Tender Shredded Chicken: Cooked chicken breasts or boneless chicken thighs shredded into bite-sized strands soak up the spiced broth. Pro Hack: Store-bought rotisserie chicken breast works brilliantly on busy weeknights! Cannellini or Great Northern Beans: Creamy white beans provide silky texture and wholesome plant-based fiber. Be sure to rinse and drain two cans, reserving half of one can to mash into a natural thickener. Diced Mild Green Chilies: Canned fire-roasted mild green chilies provide authentic Southwestern depth, gentle smokiness, and tangy aroma without fiery heat. Real Cream Cheese & Monterey Jack: Full-fat brick cream cheese softened at room temperature melts smoothly into the hot broth. Freshly grated Monterey Jack cheese adds rich stringy richness without separating. Rich Chicken Bone Broth: Provides savory depth and rich collagen body that water or basic bouillon simply cannot replicate. Aromatic Spice Trio: Toasted ground cumin, Mexican oregano, and garlic powder provide warm earthy depth, finished with fresh lime juice for citrus brightness. Step-by-Step Cooking Walkthrough 1. Sauté the Aromatics: Warm olive oil in a large Dutch oven over medium heat. Add finely diced yellow onion and minced garlic; sauté for 4 to 5 minutes until soft and fragrant. 2. Bloom the Spices: Stir in ground cumin, dried oregano, sea salt, and black pepper. Toast the spices in the warm oil for 60 seconds to release their essential oils. Active stovetop cooking: stirring rich cream cheese into simmering white chili broth. 3. Simmer Broth & Beans: Pour in the chicken bone broth, diced green chilies, sweet corn, and drained cannellini beans. Take a potato masher or back of a wooden spoon and mash roughly 1/3 of the beans against the side of the pot to thicken the broth. Bring to a gentle simmer for 15 minutes. 4. Fold in Chicken & Creaminess: Reduce heat to low. Stir in the shredded chicken, softened cream cheese cubes, and shredded Monterey Jack cheese. Stir continuously until the cheeses melt completely into a velvety, creamy broth. 5. Lime Finish & Garnish: Squeeze in fresh lime juice and stir in chopped fresh cilantro. Taste and adjust seasoning with a pinch of sea salt, then ladle hot into bowls. 3 Chef Secrets for Perfect Results 1. Soften the Cream Cheese First: Never drop refrigerator-cold cream cheese straight into hot broth, or it will curdle into tiny white flecks. Let it sit at room temperature for 20 minutes, cut it into small cubes, and stir it in over low heat for a seamless emulsification. 2. Grate Your Own Monterey Jack: Pre-shredded packaged cheeses are coated in cellulose and potato starch to prevent clumping in the bag, which inhibits smooth melting and creates a grainy texture. Grating a fresh block ensures a velvety, restaurant-grade melt. 3. Fresh Lime Juice at the Finish: Adding lime juice right before serving preserves its vibrant acidity, cutting through the rich cheese and cream to give the chili its signature bright, zesty Southwestern lift. What to Serve With Creamy White Chicken Chili Served restaurant-style with crisp tortilla strips, avocado, and fresh lime. Warm Breads: Freshly baked golden honey cornbread or warm sourdough rolls are perfect for dunking into the rich creamy broth. Crunchy Garnishes: Crisp corn tortilla chips, thinly sliced jalapeños, diced Hass avocado, and fresh cilantro leaves add delicious texture contrast. Cooling Side Salad: A crisp romaine salad tossed with cherry tomatoes, sweet corn, and a zesty cilantro lime vinaigrette. Storage, Freezing & Reheating Instructions Refrigeration: Allow chili to cool slightly, then store in an airtight container for up to 3 to 4 days in the refrigerator. The flavors become even deeper and more aromatic the next day! Gentle Stovetop Reheating: Reheat in a saucepan over medium-low heat, stirring occasionally. If the chili thickened in the fridge, add a splash of chicken bone broth or milk to restore its velvety consistency. Freezing Guidelines: Freeze chili in freezer-safe containers for up to 2 months. Thaw overnight in the refrigerator before reheating gently over low heat, whisking lightly to maintain a smooth dairy emulsion. Frequently Asked Questions Can I make this white chicken chili in a slow cooker?Yes! Add raw chicken breasts, onions, garlic, green chilies, broth, beans, and spices to the slow cooker. Cook on LOW for 6 hours or HIGH for 3
Cinnamon Sugar Baked Apple Cider Donuts: Easy Fall Recipe
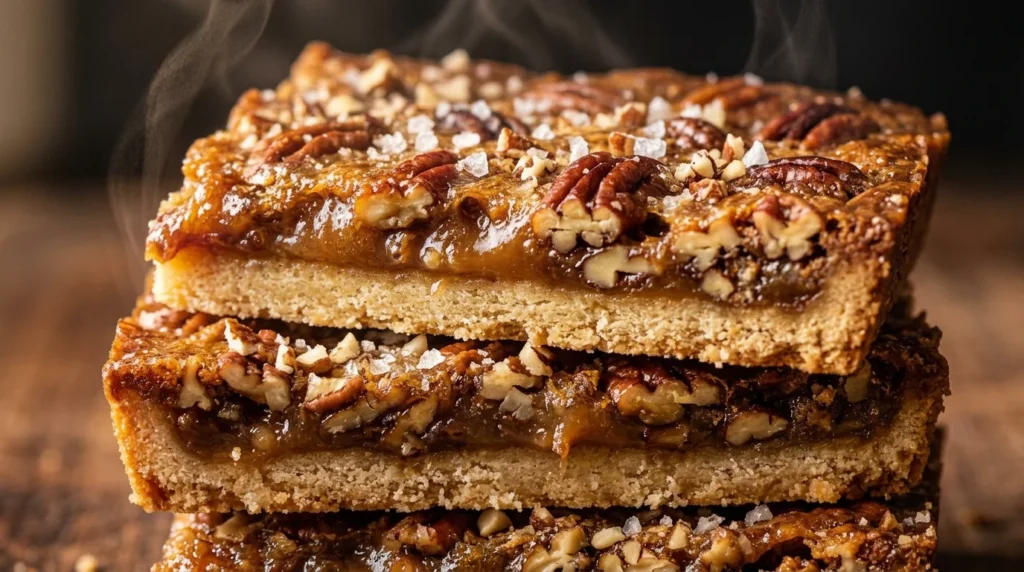
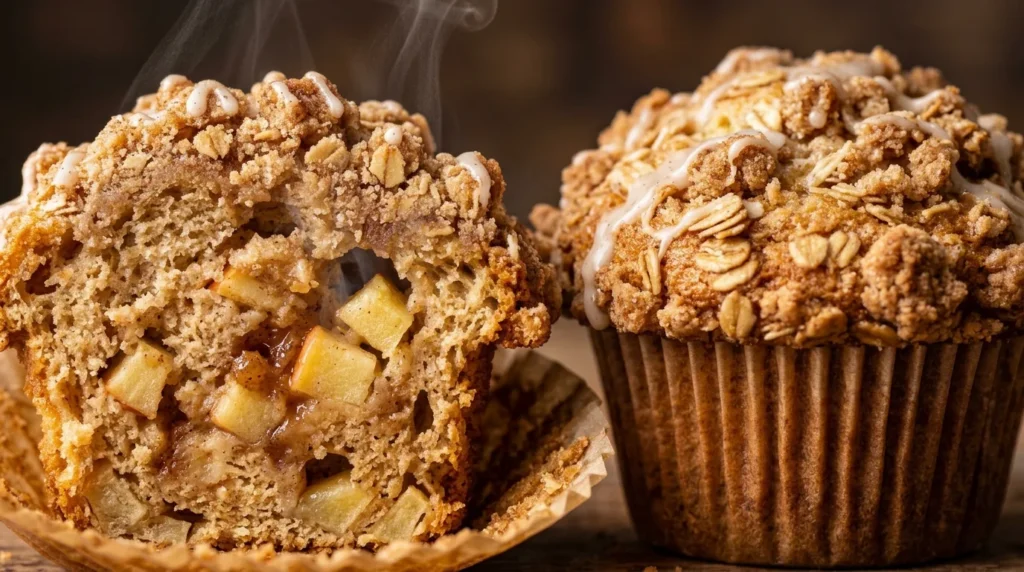
There is no aroma on earth quite as intoxicating as warm spiced cake donuts fresh from the oven, dipped in melted sweet cream butter, and tossed generously in sparkling cinnamon sugar. Capturing all the nostalgic charm of an autumn apple orchard visit, these baked apple cider donuts deliver an impossibly tender, melt-in-your-mouth crumb infused with the concentrated sweetness of reduced fresh cider, fragrant nutmeg, and Saigon cinnamon. Best of all, because they are baked rather than deep-fried, you can have a dozen bakery-style donuts warm on your table in just 35 minutes with effortless cleanup. The secret to baking apple cider donuts that rival the best country bakery stalls lies in one pivotal technique: actively simmering your cider into an aromatic reduction. Fresh apple cider contains high moisture content; simply pouring raw cider straight into batter introduces too much liquid, creating gummy or overly dense donuts with a faint apple flavor. By gently simmering the cider on your stovetop until it reduces by two-thirds into an amber syrup, you evaporate the water while concentrating natural fruit sugars, crisp malic acid, and rich autumn aromatics. When folded alongside brown sugar and pure melted butter, the result is a pillowy, delicately spiced cake that stays wonderfully moist for days. Why You’ll Love This Recipe Intense Concentrated Apple Flavor: Reducing the cider on your stovetop intensifies the crisp, sweet apple notes without diluting your tender cake batter. Oven-Baked & Mess-Free: Absolutely no splattering pots of hot frying oil or grease cleanup; simply pipe the batter into a donut pan and bake for 10 minutes. Signature Bakery-Style Crust: Dipping the warm donuts in melted butter creates the perfect adhesive for a thick, craggy crust of sparkling cinnamon sugar. 100% Halal Wholesome: Made with pure unfiltered apple cider, farm-fresh eggs, wholesome spices, and natural dairy butter with zero artificial flavorings. Key Ingredients & Smart Swaps Fresh ingredients arranged on a clean quartz workstation. Pure Unfiltered Apple Cider: Choose cloudy, traditional refrigerated apple cider rather than clear apple juice. Real cider contains apple solids and natural acidity that give these donuts their authentic orchard flavor. Pro Hack: Reduce an extra batch of cider and store in the fridge for autumn pancakes or oatmeal! All-Purpose Flour: Spoon and level your flour carefully into your measuring cups. Scooping directly from the bag packs the flour tightly, which can lead to a dry, dense donut. Brown & Granulated Sugar Blend: Dark or light brown sugar introduces molasses moisture and depth, while white granulated sugar provides structure and creates the classic sweet sparkling outer coating. Trio of Autumn Spices (Cinnamon, Nutmeg & Allspice): While cinnamon is the star, a touch of freshly grated nutmeg and pungent allspice provides that signature spiced warmth reminiscent of roadside farm stands. Melted Butter & Milk: Butter provides richness and an ultra-tender mouthfeel. Whole milk or buttermilk activates the leavening agents for maximum rise and fluffiness. Step-by-Step Cooking Walkthrough 1. Simmer & Concentrate the Cider: Pour 1 1/2 cups of fresh unfiltered apple cider into a small saucepan. Bring to a gentle simmer over medium-low heat for 15 to 20 minutes until reduced to exactly 1/2 cup. Set aside to cool to lukewarm or room temperature. 2. Whisk the Dry Aromatics: In a large mixing bowl, combine 2 cups of all-purpose flour, 1 teaspoon baking powder, 3/4 teaspoon baking soda, 1 1/2 teaspoons cinnamon, 1/2 teaspoon nutmeg, 1/4 teaspoon allspice, and 1/2 teaspoon salt. Whisk vigorously to aerate. Active autumn baking: tossing freshly baked warm donuts in glistening cinnamon sugar. 3. Blend the Wet Ingredients: In a separate bowl, whisk together the melted butter, room temperature egg, brown sugar, granulated sugar, milk, vanilla, and the cooled reduced cider until silky and homogenous. 4. Fold Gently & Pipe: Pour wet into dry and fold gently with a silicone spatula just until incorporated. Transfer the batter to a zip-top or piping bag, snip the tip, and pipe into two greased 6-cavity donut pans, filling each cavity roughly 3/4 full. 5. Bake to Springy Perfection: Bake at 350°F (175°C) for 10 to 12 minutes. The tops should spring back when lightly touched, and a toothpick inserted should come out clean with no wet batter. 6. Butter Bath & Sugar Dredge: Let cool for 5 minutes, then unmold. While still pleasantly warm, dip each donut into melted butter, then dredge thoroughly in cinnamon sugar until lavishly coated on every craggy edge. 3 Chef Secrets for Perfect Results 1. Never Skip the Cider Reduction: Pouring unreduced cider into the batter introduces too much liquid and yields a bland, doughy donut. Simmering it down to 1/2 cup intensifies the flavor tenfold while preserving the delicate balance of your cake batter. 2. Pipe, Do Not Spoon, the Batter: Cake donut batter is naturally thick and sticky. Trying to spoon it into the narrow donut wells creates uneven lumps and air pockets. Using a piping bag or gallon ziplock bag ensures smooth, perfectly round bakery rings with uniform baking. 3. Coat While Still Warm: Sugar crystals bond far more effectively when the donut is still warm from the oven. The warm surface helps melt the butter slightly into the crust, creating a sparkling, stay-put shell that will not shed off when handled. What to Serve With Baked Apple Cider Donuts Served bakery-style with fresh Honeycrisp apples and steaming spiced apple cider. Warm Autumn Drinks: Pair with a steaming mug of hot mulled cider, a cinnamon latte, or a velvety pumpkin spice cappuccino. Artisan Dips & Sauces: Serve alongside a small bowl of warm salted caramel sauce, homemade apple butter, or maple cream cheese dip. Brunch Platters: Feature these donuts alongside a savory holiday egg frittata, breakfast skillet, or fresh fruit platter with sliced Honeycrisp apples and pears. Storage, Freezing & Reheating Instructions Room Temperature Storage: Store donuts in a breathable bakery box or loosely covered container for up to 2 days at room temperature. Airtight plastic containers trap steam and cause the cinnamon sugar coating to turn slightly wet and dissolve. Freezing
Crispy Skillet Lemon Herb Chicken Thighs: 30-Min Dinner
There is nothing in the culinary world quite as deeply satisfying as the resonant crunch of shatteringly crisp chicken skin yielding to tender, succulent dark meat basted in glistening garlic herb butter. Made entirely in a single cast-iron skillet in just 30 minutes, these crispy skillet lemon herb chicken thighs deliver bistro-caliber luxury right to your weeknight dinner table. The bright acidity of fresh lemon cuts beautifully through the rich rendered pan juices, creating an intoxicating pan sauce you will want to drizzle over everything. Achieving truly extraordinary, glass-like crispy skin on stovetop chicken thighs is not a matter of luck—it is a study in heat mechanics and moisture control. By starting with thoroughly dry bone-in thighs and cooking them undisturbed skin-side down over moderate medium heat, the layer of subcutaneous fat slowly renders out rather than boiling. This natural rendering acts as its own shallow-fry medium, frying the skin in its own savory fat until impossibly golden and crisp. Once flipped, finishing the pan with foaming unsalted butter, woody rosemary sprigs, fragrant thyme, minced garlic, and a splash of wholesome chicken bone broth produces an emulsified sauce that coats every bite in deep savory richness. Why You’ll Love This Recipe Unbeatable Texture Contrast: Shatteringly crispy, blistered golden skin on top with impossibly juicy, fork-tender chicken meat underneath. Effortless 30-Minute Stovetop Meal: No oven preheating required; everything cooks swiftly and evenly right on your stovetop in one skillet. Single-Pan Simplicity: From rendering the chicken to simmering the lemon herb pan sauce, minimal cleanup means more time to enjoy your evening. 100% Halal Wholesome: Prepared with clean ingredients, fresh citrus, rich chicken bone broth, and pure dairy butter with absolutely zero alcohol deglazing. Key Ingredients & Smart Swaps Fresh bone-in chicken thighs, ripe lemons, garlic cloves, butter, and garden herbs. Bone-In, Skin-On Chicken Thighs: The bone preserves juiciness and conducts gentle heat evenly through the meat, while the skin provides that signature crackly bite. Swap: Bone-in chicken breasts can be used, though cooking times should be adjusted to prevent drying out. Fresh Lemons: You will need both thinly sliced wheels to caramelize in the hot pan butter and freshly squeezed juice to balance the savory pan drippings. Bottled lemon juice lacks the vibrant aromatic essential oils found in fresh citrus peel. Fresh Woody Herbs (Rosemary & Thyme): Fresh sprigs withstand pan heat without scorching, infusing the bubbling butter with clean, earthy, piney aromatics. Dried herbs can be substituted in a pinch (use 1/2 teaspoon each), but fresh sprigs yield the best restaurant results. Unsalted Butter & Olive Oil: Olive oil lubricates the pan during the initial high-heat sear, while butter is added later at low heat to emulsify with lemon juice into a velvety pan jus. Rich Chicken Bone Broth: Used to deglaze the caramelized fond on the bottom of the skillet without wine, adding natural collagen, body, and savory depth. Step-by-Step Cooking Walkthrough 1. Dry & Season Thoroughly: Moisture is the enemy of a crisp crust. Pat every chicken thigh completely dry using paper towels. Mix coarse sea salt, black pepper, smoked paprika, and garlic powder, then season both sides evenly. 2. Start in a Hot Skillet: Heat 1 tablespoon of olive oil in a heavy 12-inch cast-iron skillet over medium heat until the oil shimmers across the surface. Active skillet cooking: basting crackly chicken thighs with foaming garlic herb butter and caramelized lemon. 3. Sear Skin-Side Down (Do Not Move): Lay the chicken thighs skin-side down in the pan. Cook undisturbed for 12 to 14 minutes. Listen to the steady sizzle as the skin renders its fat and turns deep golden and rigid. 4. Flip and Finish Cooking: Flip the thighs over to the meat side. Cook for 6 to 8 minutes until the internal temperature reaches 165°F (74°C). 5. Baste in Foaming Butter & Herbs: Drop the heat to medium-low. Add butter, minced garlic, lemon slices, rosemary, and thyme to the open pan area. As the butter foams, use a large spoon to baste the crackly chicken skin repeatedly for 60 seconds. 6. Deglaze & Rest: Pour the chicken bone broth and fresh lemon juice into the bottom of the skillet around the meat. Simmer for 2 minutes until glossy. Remove from heat and allow the chicken to rest for 5 minutes before serving. 3 Chef Secrets for Perfect Results 1. Never Rush the Skin Render: Searing skin at extreme blazing heat will burn the surface before the fat underneath renders out, leaving rubbery skin. Medium heat is the sweet spot: it gives the fat ample time to melt away, leaving behind paper-thin, crackly skin. 2. Pour Sauce Around, Not Over, the Skin: When adding your lemon juice and chicken bone broth to deglaze the pan, always pour liquid directly onto the pan bottom around the thighs. Pouring hot liquid over the top will instantly soften your hard-earned crispy crust. 3. Let Chicken Come to Room Temp: Take your chicken thighs out of the refrigerator 15 to 20 minutes before cooking. Cold meat causes the pan temperature to plummet abruptly, creating steam instead of a fast, golden sear. What to Serve With Crispy Lemon Herb Chicken Thighs Plated restaurant-style with glistening lemon herb pan sauce, roasted asparagus, and crusty bread. Roasted Vegetables: Tender roasted asparagus spears, charred green beans, or honey glazed baby carrots pair seamlessly with the citrus aromatics. Buttery Starches: Serve over fluffy garlic mashed potatoes, steamed jasmine rice, or creamy Parmesan polenta to capture every drop of savory pan jus. Crusty Bread & Salad: Warm artisan sourdough or garlic ciabatta paired with a crisp arugula side salad tossed in lemon vinaigrette. Storage, Freezing & Reheating Instructions Refrigeration: Store leftover cooked chicken thighs and pan sauce in an airtight glass container for up to 3 to 4 days. Keep the sauce separate from the chicken if possible to maintain skin integrity. Air Fryer / Oven Reheating (Best Crispiness): Reheat in an air fryer at 375°F (190°C) for 4 to 5 minutes, or in an oven